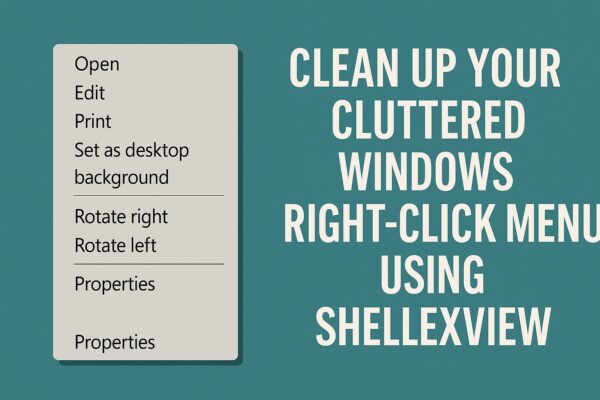
Have you ever right-clicked a file or folder on your Windows PC and thought:
“Wow, this menu is way too long…”
When you first start using Windows, the context menu—also known as the right-click menu—usually contains only simple actions like Copy, Paste, and Rename. But as you install more software, it can slowly turn into a crowded list of options you rarely, if ever, use, such as:
- “Scan with antivirus”
- “Edit with <some app>”
- “Save to Dropbox”
- “Compress to ZIP / 7-Zip”
This clutter doesn’t just look messy. It makes it harder to find the option you actually need, slows down your workflow, and can even cause the right-click menu to appear more slowly.
In this article, you’ll learn how to clean up your right-click menu using a free, portable tool called ShellEXView—safely and with the ability to undo changes at any time. No advanced skills required.
Why Does the Right-Click Menu Get So Bloated?
Almost every time you install new software, it may add its own entries to the right-click menu—often without asking you first.
This is done using Shell Extensions, which are components that plug into File Explorer to add extra features, such as archive tools, cloud storage options, or editing shortcuts.
Some of these entries are genuinely useful. But over time, many become unnecessary, and some are left behind even after the original application has been uninstalled.
The result is a messy, inconsistent menu filled with outdated, duplicate, or irrelevant actions.
What Is ShellEXView?
ShellEXView is a free utility developed by NirSoft, a well-known provider of Windows system tools.
This lightweight program scans your system and lists all registered shell extensions in one place so you can see exactly what’s been added to your right-click menu.
Key Features
- No installation required (fully portable)
- Shows which programs added which right-click menu entries
- Lets you safely disable extensions you don’t use
- Allows you to re-enable any entry later if you change your mind
ShellEXView is popular among system administrators and power users—but if you follow a few simple rules, it’s also very approachable for beginners.
How to Download and Launch ShellEXView
Step 1: Go to the Official Website
Open your browser and visit the official ShellEXView page:
🔗 https://www.nirsoft.net/utils/shexview.html
Step 2: Download the Tool
Scroll down the page and click the download link for ShellEXView to get the ZIP file.
Step 3: Extract and Run
Right-click the downloaded ZIP file and choose Extract All.
Inside the extracted folder, run one of the following:
shexview.exe(for 32-bit Windows)shexview64.exe(for 64-bit Windows)
There is no installation process. Just double-click the executable and accept the UAC prompt if Windows asks for permission.
Understanding the ShellEXView Interface
When ShellEXView opens, you’ll see a long list of entries. Each row represents a shell extension currently registered in Windows.
Here are the most important columns to pay attention to:
| Column | Description |
|---|---|
| Extension Name | The name of the shell extension (often related to what you see in the menu) |
| Type | The category of extension, such as Context Menu |
| Disabled | Shows “Yes” if the extension is currently disabled |
| Company | The software vendor (Microsoft, Dropbox, antivirus vendor, etc.) |
| File Created / Modified | When the underlying file was installed or last updated |
For cleaning up the right-click menu, your main focus should be on rows where Type = Context Menu. These are the entries that add items directly to the menu when you right-click files or folders.
How to Disable Unwanted Menu Items
Once you’ve identified an entry you no longer need, follow these steps to disable it:
- Select the item
Click the row once. For example, you might select “DropboxExt” if you never use Dropbox’s context menu. - Disable the extension
Right-click the selected row and choose Disable Selected Items.
You can also use the menu: File → Disable Selected Items
or press F7 as a shortcut. - Confirm the action
If ShellEXView asks for confirmation, click Yes. - Restart File Explorer
Open Task Manager, find Windows Explorer on the Processes tab, select it, and click Restart.
Alternatively, simply restart your PC.
Can I Undo Changes Later?
Yes—and that’s one of the major advantages of using ShellEXView.
Disabled entries are not deleted. They remain in the list, usually grayed out, so you can easily find them again.
To restore a menu item, simply select it and choose Enable Selected Items (or press F8). The entry will come back the next time you restart File Explorer.
This makes the process low risk, even if it’s your first time editing shell extensions.
Common “Bloat” Entries You Might Disable
Here are some typical right-click menu additions you may want to clean up:
- Cloud storage menus (Dropbox, Google Drive, OneDrive)
- Antivirus “Scan with…” entries (Avast, Norton, etc.)
- Archive tool submenus (7-Zip, WinRAR) you rarely use
- Fax / legacy printer-related options
- “Edit with <old editor>” entries from software you no longer use
You don’t need to strip the menu down to nothing—just remove the items that add clutter and don’t contribute to your daily workflow.
Items You Should NOT Disable
Some shell extensions are important for system stability and for File Explorer to behave normally.
As a general rule, avoid disabling:
- Extensions where the Company is Microsoft Windows or Microsoft Corporation
- Extensions labeled as Icon Handler or Thumbnail Handler
Those components control how icons, thumbnails, and previews appear in Explorer. Disabling them can cause missing icons or broken previews.
If you’re unsure about an entry, search the extension name online before disabling it.
Useful Filters and View Options
- Options → Hide All Microsoft Extensions
Hides most Microsoft entries so you can focus on third-party additions. - Options → Filter By Extension Type → Context Menu
Shows only context menu handlers that affect right-click menus. - Options → Show Only Disabled Items
Makes it easy to review everything you’ve disabled.
These filters reduce the chance of mistakes and help you stay focused on the entries that matter.
Real-World Example
On a cluttered Windows system, you might:
- Disable Dropbox and Google Drive context menus you never use
- Simplify 7-Zip so only “Add to archive…” is available
- Remove leftover entries from apps you uninstalled long ago
After doing this, the right-click menu often opens faster and becomes much easier to navigate—no more endless scrolling for basic actions like Copy or Properties.
Conclusion: A Cleaner Menu for a Faster Workflow
A bloated right-click menu doesn’t just look untidy—it slows you down every time you use it.
With ShellEXView, you can safely declutter your context menus, improve responsiveness, and make everyday tasks feel smoother.
Remember:
- You’re disabling entries, not deleting them permanently
- You can re-enable any extension later with just a few clicks
- The tool is free, portable, and widely used
💡 Bonus Safety Tips
- Create a System Restore Point before making lots of changes
- Use the Company column to identify unfamiliar extensions
- If you’re unsure about an entry, leave it alone or research it first
✔️You might also find these helpful:
▶︎ Is Your PC Sluggish? Here’s How to Clean and Speed Up Your Windows Computer
▶︎ How to Completely Disable OneDrive in Windows 11 and 10
▶︎ Printer Not Working After Windows Update? Here’s How to Fix It
💡 Looking for more tips? Check out our full list of Windows Help Guides.


