- 1 Is your Windows screen black, flickering, or just not working? You’re not alone.
- 2 Common Display Problems in Windows 10 / 11
- 3 Check the Causes Based on Your Symptom
- 4 Fixes by Scenario: Step-by-Step Troubleshooting
- 4.1 1) Check Cables & Adapters First
- 4.2 2) Force a Quick Graphics Reset (No Reboot)
- 4.3 3) Make Sure You’re on the Right Display Mode (Laptops / Multi-monitor)
- 4.4 4) Set a Supported Refresh Rate
- 4.5 5) Tame HDR & Auto-Brightness (24H2/25H2)
- 4.6 6) Update or Clean-Reinstall the Display Driver
- 4.7 7) Boot to Safe Mode for Stubborn Black Screens
- 4.8 ❓ Frequently Asked Questions (FAQ)
- 5 Final Thoughts: Don’t Panic!
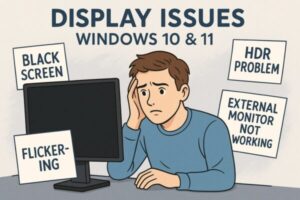
Is your Windows screen black, flickering, or just not working? You’re not alone.
You press the power button, but the screen stays pitch black. Or it suddenly goes dim, flickers nonstop, or won’t recognize your second monitor. This can be maddening—especially mid-task. In this up-to-date guide for Windows 10/11 (including 24H2/25H2), we map symptoms to causes and give clear fixes you can follow step by step.

Common Display Problems in Windows 10 / 11
If you see any of the following, the root cause is usually settings, drivers, or cabling—not a dead screen:
- The screen remains black even though the PC is powered on
- Brightness is stuck, way too dim/bright, or changes by itself
- External monitors aren’t detected or show “No Signal”
- Flickering/rapid flashing after login or app launch
- Washed-out colors or odd tints when HDR is enabled
Most of these are fixable without replacing hardware.
Check the Causes Based on Your Symptom
Match your symptom to the likely cause before you start:
| Symptom | Likely Cause |
|---|---|
| Black screen | Loose/failed cable, sleep/wake glitch, faulty/locked display driver |
| Can’t adjust brightness | GPU driver mis-config, auto-brightness features enabled |
| External monitor not detected | Wrong display mode (Win+P), bad cable/adapter, GPU driver issue |
| Flickering/flash | Incorrect refresh rate, display driver faults |
| Strange HDR colors | HDR toggled on with incompatible panel or wrong SDR/HDR balance |
Fixes by Scenario: Step-by-Step Troubleshooting
1) Check Cables & Adapters First
Why this works — External displays fail most often due to loose HDMI/DP/USB-C connections or flaky docks. Reseat everything; test a different cable/port; try connecting the monitor directly (bypass the hub/dock) to isolate the issue.
2) Force a Quick Graphics Reset (No Reboot)
Shortcut: Press Windows + Ctrl + Shift + B to reset the graphics driver. You should hear a beep and see a brief flicker; if the image returns, it was a transient driver hang.
⚠️ Works only if Windows is actually running in the background (fans/LEDs active, Caps Lock toggles, etc.).
3) Make Sure You’re on the Right Display Mode (Laptops / Multi-monitor)
Press Windows + P and choose: PC screen only / Duplicate / Extend / Second screen only. Picking the wrong mode (e.g., “Second screen only” when the external is off) looks identical to a black screen.
For multi-monitor layouts and window restore behavior after docking/undocking, review the Multiple displays options under Settings → System → Display.
4) Set a Supported Refresh Rate
Wrong refresh rates cause flicker, distortion, or blank output. Go to Settings → System → Display → Advanced display and pick a rate your monitor supports (e.g., 60/120/144Hz). If the screen goes black, wait—Windows will revert.
5) Tame HDR & Auto-Brightness (24H2/25H2)
HDR can look washed-out on some panels or apps. In Settings → System → Display → HDR, turn HDR off (or adjust SDR vs. HDR balance). 2025 updates add finer HDR/Dolby Vision controls so you can keep system HDR off while allowing HDR video when needed.
Also disable Automatically adjust brightness and any battery-saver dimming if your screen goes unpredictably dark.
6) Update or Clean-Reinstall the Display Driver
From Device Manager → Display adapters, update your GPU (Intel/NVIDIA/AMD). If problems persist, remove the driver fully (DDU in Safe Mode) and install the latest WHQL package from your GPU vendor. Driver remnants are a common cause of black/flicker issues.
7) Boot to Safe Mode for Stubborn Black Screens
Safe Mode loads minimal drivers so you can roll back/replace a bad GPU driver without crashing. Go to Settings → System → Recovery → Advanced startup → Restart now → Troubleshoot → Advanced options → Startup Settings → press 4/F4 for Safe Mode (or 5/F5 with Networking).
If Nothing Else Works: Final Options
| Method | Description |
|---|---|
| System Restore | Roll back to a known-good point if a recent change broke display output |
| Advanced Startup / Reset this PC | Repair/Reset from the recovery menu when Windows won’t render a desktop. |
| Hardware check | Test with another monitor/cable/GPU; inspect docks/adapters and USB-C DP Alt-Mode paths |
❓ Frequently Asked Questions (FAQ)
Q. How can I tell if Windows is actually running behind a black screen?
Look for signs: power LED on, fans spinning, storage LED flickers, or Caps/Num Lock toggles. If yes, try Win+Ctrl+Shift+B and Win+P to correct the output mode.
Q. My second monitor isn’t working—what should I try first?
Press Win+P and select Duplicate or Extend; confirm cables/inputs and update the GPU driver. If the mode keeps reverting after docking/undocking, review Multiple displays settings.
Final Thoughts: Don’t Panic!
Most display problems trace back to drivers, modes (Win+P), refresh-rate mismatches, or HDR/brightness features—not failed hardware. Work through the steps above, and you’ll usually restore the picture without a repair shop.
What’s Next?
If this helped, try these related guides:
・💻 Fixing Windows 11 Update KB5058411: Common Errors and Solutions
・🔧 Common Windows Error Codes and How to Fix Them
・Can’t Connect via RDP with Your Microsoft Account? Here’s Why—and How to Fix It (Windows 10)


