Creating folders is one of the simplest yet most essential tasks in Windows 11. Whether you’re organizing documents, photos, videos, or project files, folders help keep everything neat, accessible, and easy to manage. This guide will walk you through the basic steps of creating a new folder, as well as useful tips, shortcuts, and lesser-known tricks to streamline your workflow.
Why Use Folders?
Before we dive into the “how,” let’s quickly look at the “why.”
Using folders helps you:
- Keep related files together
- Find documents faster
- Avoid desktop clutter
- Manage backups more efficiently
- Improve productivity
Just like real-life folders in a filing cabinet, digital folders on your computer bring order to chaos.
Method 1: Create a Folder Using Right-Click Menu
This is the classic method and works in almost any location in Windows 11.
Steps:
- Navigate to the location where you want to create the folder. This could be your:
- Desktop
- Documents folder
- External drive
- Cloud storage (OneDrive, Google Drive, etc.)
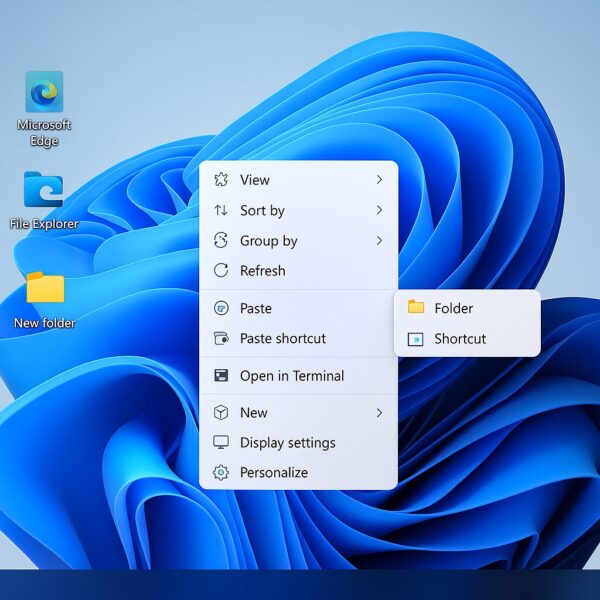
- Right-click on any empty space (not on an existing file).
- Hover over “New” in the context menu.
- Click “Folder” from the list.
- A new folder will appear with the name field highlighted. Type a name for your folder (e.g., “Photos 2025”) and press Enter.
Note: If you click away without typing a name, the folder will be named “New Folder” by default. You can always rename it later.
Method 2: Use the Keyboard Shortcut (Ctrl + Shift + N)
Want to create a new folder even faster? Use this built-in shortcut:
- Go to your desired folder location.
- Press Ctrl + Shift + N on your keyboard.
- A new folder will be instantly created, ready to be named.
Pro Tip: This works even when you’re inside File Explorer or on the Desktop. It’s perfect for users who prefer keyboard navigation.
Advanced Folder Naming Tips
When naming folders, keep these tips in mind:
- Use descriptive names (e.g., “Project_Q3_Reports” instead of “New Folder 3”).
- Avoid special characters like \/:*?”<>| which are not allowed in folder names.
- Use dates or numbers to sort them easily (e.g., “2025_08_MeetingNotes”).
- Tip for tech-savvy users: You can even automate folder creation using PowerShell or batch scripts if you frequently make complex folder structures.
Creating Folders in Different Locations
Here are a few common spots where you might want to create folders—and how to access them quickly:
| 📍 Location | 🧭 How to Access |
|---|---|
| Desktop | Minimize all windows → Right-click on desktop |
| Documents | Open File Explorer → Click on “Documents” in left sidebar |
| USB Drive | Plug in drive → Open from File Explorer |
| OneDrive | File Explorer → Click “OneDrive” in left sidebar |
| Network Share | File Explorer → Type \\ServerName\SharedFolder |
Bonus: How to Create Multiple Folders at Once (Using Command Prompt)
If you need to create several folders quickly (e.g., “Week1,” “Week2,” “Week3”), try this trick:
Steps:
- Open Command Prompt (Press Win + R, type cmd, hit Enter).
- Navigate to the folder location using cd command. For example:
Use the following command to create multiple folders:
All four folders will be created instantly!
Organizing Folders with Color (Third-Party Tool)
Windows 11 does not natively support color-coded folders, but you can use third-party tools like Folder Marker or CustomFolder to assign colors or icons to folders.
- 🔴 Red for urgent projects
- 🟢 Green for completed work
- 🔵 Blue for ongoing tasks
This visual cue helps you scan and find things faster.
Permissions and Folder Access
In some system folders (e.g., C:\Program Files), you may not be allowed to create folders without admin privileges. If you see a “You need permission” message:
- Try creating the folder in a different location like Documents or Desktop.
- Or Run File Explorer as Administrator:
- Click Start, type “File Explorer”
- Right-click it and choose Run as administrator
Warning: Avoid modifying system folders unless necessary.
How to Rename or Delete a Folder
Once a folder is created, you might want to rename or remove it.
To Rename:
- Right-click the folder → Select Rename.
- Or select it and press F2, then type a new name.
To Delete:
- Right-click the folder → Select Delete.
- Or select it and press the Delete key.
- Files go to the Recycle Bin, from where you can restore or permanently delete them.
Troubleshooting: Can’t Create a New Folder?
If you find that the “New > Folder” option is missing or not working, try the following:
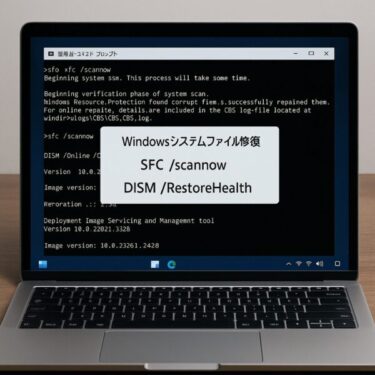
Scan your system for file system errors using:
Restart Windows Explorer via Task Manager
Check if the drive is write-protected
Scan your system for file system errors using:
Try creating the folder in Safe Mode
If all else fails, create a new folder via Command Prompt or PowerShell as shown earlier.
Pro Use Case: Pre-Made Folder Structures
For work, school, or creative projects, you might want to reuse the same folder structure.
Example:
Instead of creating each folder manually, you can use a script:
Save this as a .bat file and double-click it anytime you start a new project.
Final Thoughts
Creating folders may seem like a small task, but it’s the backbone of staying organized on your PC. With just a few clicks—or a handy shortcut—you can tidy up your workspace and improve your productivity.
Whether you’re a beginner or a power user, mastering folder creation is a basic yet powerful skill in Windows 11.
Recommended Tools for Organizing Files
【Affiliate Links】
🛠️ Popular File Organization Accessories
- USB Stick Memory – Store and transport your folders easily.
- HDMI Cable – Organize multimedia setups with labeled folders.
- Compressed Air Duster – Clean your workspace physically as you declutter digitally.
※ The links above are affiliate links. Your support helps keep our site running.
✔️You might also find these helpful:
▶︎How to Enable Dark Mode in Windows 11
▶︎How to Split Your Windows Screen into 4 Sections
▶︎How to Change Your Desktop Wallpaper in Windows 11 Guide
💡 Looking for more tips? Check out our full list of Windows Help Guides.


