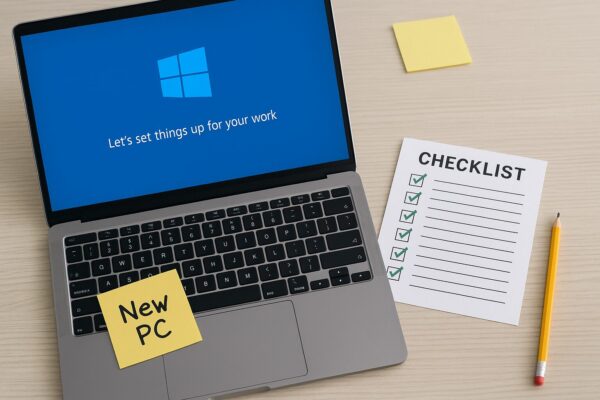
Getting a brand-new PC is exciting! But if you jump in and start using it right away, you may later think, “I wish I had set that up first…” This article walks you through the essential first-time settings and preparations you should complete right after buying a Windows PC — in a simple step-by-step order.
- 1 Basic Settings & Handy Preparations
- 1.1 1. Initial Setup (Sign In with or Create a Microsoft Account)
- 1.2 2. Connect to Wi-Fi
- 1.3 3. Run Windows Update
- 1.4 4. Verify or Install Antivirus Software
- 1.5 5. Remove Unnecessary Pre-installed Apps
- 1.6 6. Set Up Data Backup (OneDrive or External Drive)
- 1.7 7. Review Power Options & Sleep Settings
- 1.8 Recommended settings
- 1.9 8. Install Browsers and Everyday Software
- 1.10 9. Customize Your Desktop & Shortcuts
- 1.11 10. Create a USB Recovery Drive
- 2 Summary: A Little Setup Goes a Long Way
Basic Settings & Handy Preparations
1. Initial Setup (Sign In with or Create a Microsoft Account)
When you power on the PC for the first time, you’ll see the Windows out-of-box setup screen.
Follow the on-screen instructions to sign in with your existing Microsoft account, or create a new one if you don’t have one yet.
Why this matters
- Signing in with a Microsoft account lets you easily use OneDrive, Microsoft Store, and Office apps.
- You can choose a local (offline) account instead, but for beginners the online account is usually more convenient and less confusing.
2. Connect to Wi-Fi
Connecting your PC to the internet early on makes everything smoother — from downloading Windows updates to installing apps.
Select your home Wi-Fi network from the list, enter the password, and confirm that the connection shows as “Connected.”
3. Run Windows Update
Even a “brand-new” PC often ships with an older build of Windows.
※ Updates can take some time, so it’s best to handle them as early as possible instead of in the middle of your work later.
How to update on Windows 11 / 10
1. Click the Start button (bottom-left of the screen).
2. Select the gear icon or open Settings.
(Shortcut: Press Windows key + I to open Settings instantly.)
3. Go to Settings → Windows Update.
Click Check for updates and install all important updates that appear.
4. Verify or Install Antivirus Software
Windows includes built-in protection called Windows Security (Defender), which is active by default on most new PCs.
▶︎ Learn more about Defender vs Firewall
If you prefer, you can install a commercial antivirus product for extra features or peace of mind.
⚠️ Note:
Running multiple antivirus programs at the same time can cause slowdowns, conflicts, or unexpected errors. If you install a third-party antivirus, avoid having two “real-time protection” tools enabled simultaneously.
5. Remove Unnecessary Pre-installed Apps
Many new PCs come with trial versions of software or vendor tools you may never use.
Open Settings → Apps → Installed apps and uninstall anything you clearly don’t need. This helps keep the PC clean and may improve performance.
6. Set Up Data Backup (OneDrive or External Drive)
To protect your files from accidents, hardware failures, or malware, set up a backup solution right from the start.
Recommended options
- OneDrive: Automatically backs up folders such as Desktop, Documents, and Pictures to the cloud.
- External HDD / SSD: Ideal if you prefer offline backups or have a slow internet connection.
7. Review Power Options & Sleep Settings
Power settings control how quickly the screen turns off, when the PC goes to sleep, and how it balances performance vs battery life.
Steps:
- Click Start (bottom-left).
- Select the gear icon (Settings).
- Go to Settings → System → Power & battery.
- Scroll down and open Additional power settings (on Windows 11 it may appear as “Additional power mode settings”).
Recommended settings
| Status | Recommended Setting |
|---|---|
| Screen off (plugged in) | After 10–15 minutes |
| Time to sleep | On battery: 10 min / Plugged in: 30 min |
| Power mode | “Balanced” or “Best performance” (for desktops and powerful laptops) |
If you never want your PC to sleep automatically, set the “sleep after” option to Never — but keep in mind this may increase power usage.
If you want your laptop to stay on when you close the lid (for example, when using an external monitor):
- Open Additional power settings.
- Select “Choose what closing the lid does”.
- Set “When I close the lid” to “Do nothing” (for the conditions you prefer).
Fine-tuning these options helps avoid unwanted shutdowns and can extend battery life while fitting your usage style.
8. Install Browsers and Everyday Software
Install your everyday apps early so that you can work comfortably from day one. Typical examples include:
- Web browsers: Google Chrome, Firefox, or your favorite alternative
- Communication tools: LINE, Zoom, Microsoft Teams, etc.
- Office apps: Word, Excel, PowerPoint, or Microsoft 365
9. Customize Your Desktop & Shortcuts
- Show useful icons such as This PC, Recycle Bin, and Downloads on the desktop.
- Pin frequently used apps (browser, mail, Office, etc.) to the taskbar.
- Switch to dark mode or change your wallpaper to make the workspace feel like “yours.”
▪ Wallpaper Settings (Windows 11/10)
- Right-click on an empty area of the desktop.
- Select Personalize.
- Choose Background or Wallpaper.
- Select a style: Picture, Slideshow, or Solid color.
- Click Browse to pick your favorite image and apply it.
- You can select multiple images to create a slideshow that changes automatically.
- Free themes and wallpapers are also available from the Microsoft Store.
10. Create a USB Recovery Drive
Setting up a recovery USB drive now can save you in case Windows fails to start or runs into serious problems later.
How to create it
Type “Recovery Drive” into the search box on the taskbar, open the tool, and follow the on-screen instructions to create a recovery drive on a USB stick.
※ The USB drive will usually be formatted during this process, so use an empty one or back up its contents first.
Summary: A Little Setup Goes a Long Way
Spending a bit of time on initial setup greatly improves how smooth, secure, and comfortable your PC will feel in daily use.
Instead of “just starting to use it” and hoping for the best, go through these 10 steps in order for a more reliable, worry-free experience.
Frequently Asked Questions (FAQ)
Q. Is a Microsoft account absolutely necessary?
You can use a local (offline) account, but to download apps from the Microsoft Store, sync settings, and use OneDrive, a Microsoft account is required. For most beginners, using a Microsoft account is the easiest option.
Q. Is free antivirus software enough?
For many home users, Windows Defender offers solid protection. If you handle sensitive data or want extra features like password managers or VPN bundles, a paid security suite can be a good investment.
Q. How much time does the initial setup take?
If you include Windows Update and app installations, it’s a good idea to set aside enough time to complete everything in one go, rather than stopping halfway. Once it’s done, you’ll be able to use your PC much more comfortably.
Setting up a new PC may feel a bit overwhelming, but if you follow the steps one by one, it’s completely manageable.
By using this guide as a checklist, you can start your PC life with confidence and fewer surprises.
To avoid the future feeling of “I should have set that up earlier…,” take a moment now to go through each item and complete your setup properly.
Recommended Articles:
▶︎ How to Fix Windows Update Error KB5063060 – Complete Guide
▶︎ How to Fix “No Internet Access” on Windows: Causes and Solutions
▶︎Why Windows Gets Stuck at 100% Disk Usage — Full Fix Guide for Automatic Maintenance Problems


