How I Finally Fixed 100% Disk Usage on My Windows 11 Laptop (2025 Update)
Are you dealing with a Windows laptop that suddenly becomes unresponsive, freezes for minutes, or makes even simple tasks painfully slow?
That’s exactly what happened on my Fujitsu LIFEBOOK U Series (Windows 11 Pro). The keyboard was lagging, apps took ages to open, and sometimes the entire system locked up. When I opened Task Manager, I noticed something strange:
The Disk column stayed at 90–100% almost all the time — even when I wasn’t doing anything.
If you’re seeing similar symptoms, especially on an older laptop with a SATA SSD or HDD, this guide walks through:
- What I tried (that didn’t help)
- The real cause in my case
- The exact registry tweak that finally fixed it
- 1 Attempts That Did Not Fix the Problem
- 2 The Real Culprit: MSI Mode on the AHCI Controller
- 3 ⚠ Important Warnings Before You Start
- 4 Confirm You’re Using the Microsoft AHCI Driver
- 5 Step 1: Copy the Device Instance Path
- 6 Step 2: Disable MSI Mode in the Registry
- 7 What Changed After Reboot?
- 8 Who Is This Fix For?
- 9 When Not to Use This Method
- 10 Final Thoughts
Attempts That Did Not Fix the Problem
Before touching the registry, I tried the usual suspects that many tutorials recommend.
1. Disabling Windows Search
Windows Search can generate a lot of disk I/O during indexing, so it’s often blamed for high disk usage.
I opened services.msc → right-clicked Windows Search → Stop (and even set it to Disabled).
Result: No change at all. Disk usage stayed around 100%.
2. Disabling SysMain (Superfetch)
SysMain (formerly Superfetch) pre-loads frequently used apps into memory to speed up launches, but it sometimes causes disk spikes on certain systems.
Again in services.msc, I disabled SysMain.
Result: Disk usage still hovered between 90–100%. No noticeable improvement.
3. Checking the Disk with chkdsk
Next, I checked whether the drive itself was failing:
chkdsk C: /f /rAfter a reboot and a long scan, no errors were reported.
Result: The laptop was still extremely slow, and Task Manager still showed 100% disk usage.
4. Updating OEM Drivers (Fujitsu Support)
I visited the Fujitsu support site and installed all the latest chipset and storage drivers for the LIFEBOOK series.
Result: The system felt slightly more stable, but the 100% disk problem remained.
At this point, it was clear that neither Windows Search, nor SysMain, nor a simple disk check was the real cause.
The Real Culprit: MSI Mode on the AHCI Controller
After more research, I found multiple reports on Microsoft Q&A, Dell, MSI, and other OEM sites describing a specific scenario:
Some AHCI SATA controllers using the Microsoft inbox driver
StorAHCI.syscan trigger a firmware bug when MSI (Message Signaled Interrupts) mode is enabled, causing the disk to sit at 100% usage.
Microsoft’s own documentation describes a workaround:
disable MSI mode for the affected AHCI controller via the Registry, which forces Windows to use legacy interrupt handling instead of MSI.Microsoft Knowledge Base Archive
Once I applied this tweak on my Fujitsu LIFEBOOK, disk usage dropped from nearly 100% to just a few percent within seconds after reboot.
⚠ Important Warnings Before You Start
Because this fix involves editing the Windows Registry, please read this carefully:
- Create a system restore point or a full backup first.
- This workaround is intended for systems using a SATA AHCI controller with
StorAHCI.sys. - It’s not meant for recent NVMe-only systems or systems using vendor-specific RAID controllers.
- A wrong registry edit can cause boot problems (Microsoft’s forums include cases where users disabled MSI on the wrong device and Windows failed to start).
If you’re not comfortable editing the registry, ask someone experienced to help you, or consider trying safer fixes first (disabling SysMain, checking for malware, updating drivers, etc.).
Confirm You’re Using the Microsoft AHCI Driver
- Right-click Start → select Device Manager.
- Expand IDE ATA/ATAPI controllers.
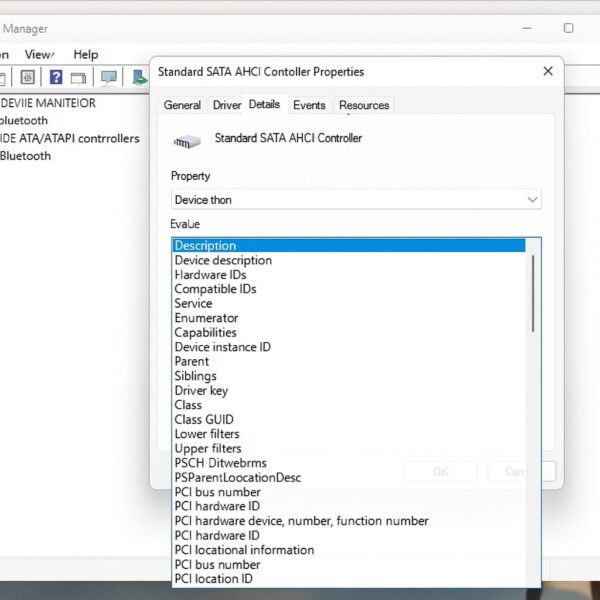
- Right-click your Standard SATA AHCI Controller → Properties.
- Go to the Driver tab and check Driver Provider:
- If it shows Microsoft and the driver file is
StorAHCI.sys, this workaround applies to your case.
- If it shows Microsoft and the driver file is
If your system uses a different storage technology (for example, an NVMe controller or a proprietary RAID driver), this specific MSI fix may not be appropriate.
Step 1: Copy the Device Instance Path
① Open Device Manager.
② Expand IDE ATA/ATAPI controllers → right-click Standard SATA AHCI Controller → Properties.
③ In the Details tab, open the Property dropdown and select Device instance path (or Device Instance ID, depending on your Windows build).

④ Copy the entire value shown (right-click → Copy). You’ll need this string in the Registry Editor.
Step 2: Disable MSI Mode in the Registry
Again: double-check that you are editing the correct controller. If your PC has more than one AHCI controller, you may need to repeat these steps for each one attached to a system drive, just as Microsoft and OEM guides suggest.
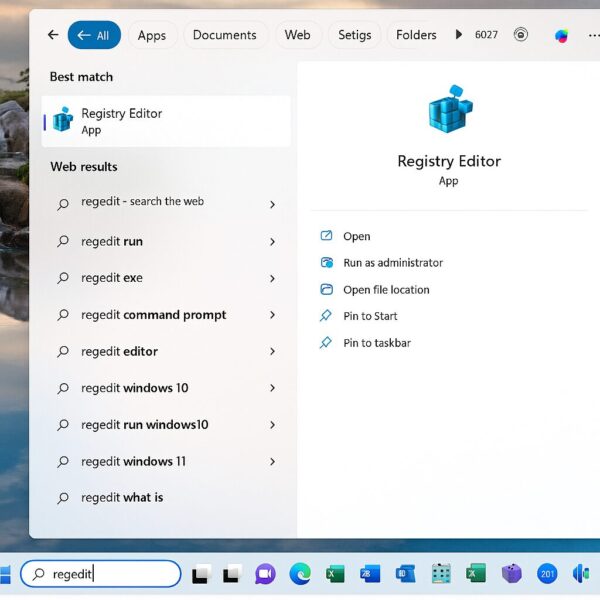
① Press Windows key + R, type regedit, and press Enter to open Registry Editor.

② In the left pane, navigate to:
HKEY_LOCAL_MACHINE\SYSTEM\CurrentControlSet\Enum\PCI③ Under PCI, find the key that matches the device instance path you copied earlier.
It will look something like:
VEN_XXXX&DEV_YYYY&SUBSYS_...\ <random subkey>\ Device Parameters\Interrupt Management\ MessageSignaledInterruptProperties④ Select MessageSignaledInterruptProperties. In the right pane, locate the MSISupported value.
⑤ Double-click MSISupported and change the Value data from 1 to 0 (Base: Hexadecimal is fine).
⑥ Click OK, close the Registry Editor, and restart your PC.
These steps mirror the official workaround described by Microsoft and repeated in Dell / MSI documents for 100% disk usage caused by AHCI + MSI mode.
What Changed After Reboot?
Right after the reboot, I opened Task Manager and watched the Disk column:
- At startup, disk usage spiked briefly (which is normal),
- Then it dropped to under 10%,
- And stayed there during normal use.
The results:
- No more constant freezes
- Keyboard and mouse input felt responsive again
- Apps opened at normal speed
In short, the laptop went from “almost unusable” to perfectly usable again — without replacing the SSD.
Who Is This Fix For?
From my experience and from Microsoft / OEM reports, this registry tweak is most effective when:
- You have an older laptop or desktop with a SATA SSD or HDD
- You upgraded from Windows 10 to Windows 11 (including 23H2 / 24H2) and started seeing 100% disk usage
- Task Manager shows Disk at 90–100% but CPU and RAM usage are relatively normal
- You’ve already tried basic fixes (disabling SysMain, Windows Search, malware scans, driver updates) without success
This MSI-related bug has been observed on machines from multiple vendors (Dell, Lenovo, MSI, and others), not just Fujitsu.
When Not to Use This Method
Skip this fix or proceed very carefully if:
- Your system uses NVMe rather than a SATA AHCI controller
- You see obvious signs of hardware failure (frequent SMART errors, clicking sounds, or
chkdskreporting bad sectors) - You are not comfortable restoring Windows from a restore point if something goes wrong
In those cases, consider:
- Checking your drive’s SMART status with vendor tools
- Running
sfc /scannowandDISM /Online /Cleanup-Image /RestoreHealth - Updating BIOS / UEFI firmware
- Ultimately, replacing a failing HDD with an SSD
Final Thoughts
This MSI/AHCI issue is a bit of an “advanced” fix, but it can be a game changer for specific systems:
- It’s based on a documented Microsoft workaround for certain AHCI controllers.
- It still applies to modern Windows 10 / 11 builds in 2025.
- When it’s the right match for your hardware, the improvement can be dramatic.
If your Windows 10 or 11 machine has been stuck at 100% disk usage and all the usual tricks failed, checking your AHCI controller’s MSI settings is absolutely worth a try — as long as you back up first and follow the steps carefully.
✔️You might also find these helpful:
▶︎How to Clean Up a Cluttered Right-Click Menu Using ShellEXView (2025 Edition)
▶︎Blurry CJK Fonts in Chromium Browsers on Windows
▶︎How to Fix Windows Event ID 10010: DCOM Server Not Responding
💡 Looking for more tips? Check out our full list of Windows Help Guides.


