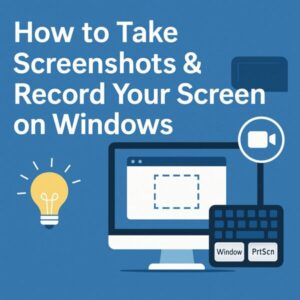
If you’ve ever needed to capture an error message, a step in a tutorial, or a quick demo for a colleague, Windows gives you several excellent tools—no extra installs required. This updated 2025 guide shows the fastest ways to take screenshots and record your screen on Windows 10 and 11, plus what’s changed recently (like the Snipping Tool’s recording and auto-save options) and how to fix common problems.
How to Take a Screenshot on Windows (2025 edition)
Method 1: Print Screen (classic copy to clipboard)
Press PrtScn to copy the entire screen to your clipboard, then Ctrl + V into Word, Paint, or an editor. On some laptops you may need Fn + PrtScn. This method is instant and doesn’t create a file unless you save one manually.
Note: On many Windows 11 PCs, the Print Screen key can be mapped to open Snipping Tool instead. You can change this under Settings > Accessibility > Keyboard > “Use the Print screen key to open screen snipping”. Turn it off to restore classic behavior.
Method 2: Windows + PrtScn (auto-save a full-screen shot)
Press Win + PrtScn. The screen dims briefly and your image is saved automatically to Pictures > Screenshots. This is the quickest way to get a file without opening an app.
Method 3: Windows + Shift + S (Snipping Tool)
Press Win + Shift + S to open Snipping Tool’s overlay, then drag to capture a region (or choose Window/Fullscreen). Click the preview toast to annotate, crop, or save. In 2025, Snipping Tool also offers auto-save and Text actions (OCR) to copy text from images—enable these in Snipping Tool Settings. By default, auto-saved shots go to Pictures > Screenshots (you can change this location).
Tip: If you don’t see auto-save, update the Snipping Tool from Microsoft Store. Admins can also control this setting via policy/registry.
How to Record Your Screen on Windows
Option 1: Snipping Tool (built-in screen recorder, with audio)
Open Snipping Tool from Start, switch to the Record tab (camera icon), choose the area, and click Start. You can include microphone and system audio from Settings. Recordings save as .mp4 to Videos > Screen Recordings by default.
Why use it: quick, integrated, no watermark; perfect for short how-tos and app demos.
Option 2: Xbox Game Bar (Win + G)
Press Win + G, open the Capture widget, then use Win + Alt + R to start/stop. Files are saved to Videos > Captures. Note the design limitation: Game Bar records a single app window and won’t capture the desktop or File Explorer. If buttons are greyed out, enable captures in Settings or repair/reset the app.
Option 3: Clipchamp (built-in editor with screen/camera recorder)
Clipchamp, now bundled on most Windows 11 devices, includes a free screen & camera recorder and simple editing (trim, captions, multi-tracks). Great when you need to edit right after recording.
Option 4: PowerPoint’s Screen Recording
In PowerPoint, go to Insert > Screen Recording, select an area, and record. The video embeds in your slide and can be saved as MP4—handy for training decks.
Where do my captures go? (default paths)
| Tool | Type | Default save location |
|---|---|---|
| Win + PrtScn | Screenshot (PNG) | Pictures\Screenshots |
| Snipping Tool (image) | Screenshot (PNG/JPG) | Pictures\Screenshots when auto-save is ON |
| Snipping Tool (video) | Recording (MP4) | Videos\Screen Recordings |
| Xbox Game Bar | Recording (MP4) | Videos\Captures |
You can change these in each app’s settings. Snipping Tool also exposes a “Change” button for the auto-save folder.
Troubleshooting (most common issues in 2025)
Screenshots don’t work as expected
Print Screen opens Snipping Tool instead of copying? Toggle Settings > Accessibility > Keyboard > Use the Print screen key to open screen snipping Off to restore classic behavior. On some laptops, use Fn + PrtScn.
Need only part of the screen? Use Win + Shift + S and the region selector. To extract text from a screenshot (copy/paste code, error messages), open the snip and click Text actions (OCR).
Snipping Tool or Game Bar won’t record
First, confirm recording is allowed: Settings > Gaming > Captures. If Game Bar’s buttons are greyed out, Repair/Reset the app under Settings > Apps > Installed apps > Xbox Game Bar > Advanced options. Remember: Game Bar cannot record the desktop/File Explorer—use Snipping Tool recording or Clipchamp instead.
No audio in recordings? In Snipping Tool’s Settings, enable Include microphone input and (if available) Include system audio. Also check Control Panel > Sound > Recording to make sure the mic is enabled and not muted.
Can’t find the file? Snipping Tool videos go to Videos\Screen Recordings; Game Bar videos to Videos\Captures. Unsaved Snipping Tool recordings can sometimes be recovered from %LOCALAPPDATA%\Packages\Microsoft.ScreenSketch_8wekyb3d8bbwe\TempState.
When to use which tool
Need a quick picture? Press Win + PrtScn or use Snipping Tool for a region. Recording a short how-to with voice? Use Snipping Tool’s recorder. Capturing a game or single app window with hotkeys? Game Bar is still convenient. Editing a tutorial afterward? Record in Clipchamp and edit on the spot.
Summary Table (2025)
| Need | Best tool | Why |
|---|---|---|
| Full screen screenshot as a file | Win + PrtScn | Instant PNG in Pictures\Screenshots |
| Region/window screenshot + annotate/OCR | Snipping Tool | Markup, crop, auto-save, copy text from image |
| Short how-to recording (with mic/system audio) | Snipping Tool (Record) | Built-in, simple MP4 output |
| Game/app recording with hotkeys | Xbox Game Bar | Overlay controls; saves to Videos\Captures |
| Screen + camera + quick edits | Clipchamp | Record and edit in one place |
With these options, you can capture exactly what you need—faster and with better results than ever. Start with Snipping Tool for most tasks, switch to Game Bar for app-focused recording, and pick Clipchamp when you want to edit immediately.
References & notable changes (2024–2025)
Snipping Tool: annotate, Text actions (OCR), recording, and auto-save options; Print Screen mapping; default save locations; Game Bar limitations and repair/reset guidance; Clipchamp’s built-in recorder. Sources:
Give them a try and find what works best for your needs!
✔️Here are some other Windows tips you may find useful:
▶︎Fixing Windows 11 Update KB5058411: Common Errors and Solutions
▶︎How to Fix Windows Update Error KB5063060 – Complete Guide
▶︎Fix Windows Update Error 0xc1900208 — Causes, Solutions & Expert Tips
← Back to English Article List


