- 1 Introduction: Is “Checking for updates…” Stuck Forever?
- 2 Why Is the Windows Update Scan Not Responding?
- 3 Microsoft’s Official Fix: Configuration Update KB5062324
- 4 Hidden Tips and Extra Troubleshooting Tricks
- 5 Summary Table: Symptoms and Recommended Fixes
- 6 Final Thoughts: Don’t Live with a Broken Update System
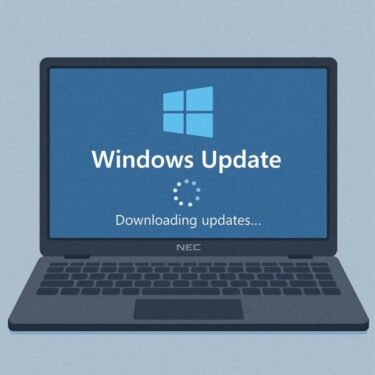
Introduction: Is “Checking for updates…” Stuck Forever?
Does your Windows 11 PC sit on “Checking for updates…” for ages and never seems to finish? You’re not the only one.
Since the rollout of Windows 11, version 24H2, some devices have been hit by a bug where Windows Update gets stuck during the scan phase and never moves on to downloading or installing updates. Even after multiple restarts, the scan doesn’t complete, leaving your PC without the latest patches and you stuck staring at a spinning circle.
The good news: Microsoft has officially acknowledged this issue and provided a fix via configuration update KB5062324, which is also included in later cumulative updates such as KB5058499 and newer monthly rollups.
In this guide (updated for late 2025), you’ll learn why the scan hangs, how to install the Microsoft-recommended updates manually, and what extra troubleshooting steps you can try if Windows Update is still misbehaving.
Why Is the Windows Update Scan Not Responding?
On affected Windows 11 24H2 systems, the “Checking for updates…” phase can freeze due to internal glitches in the Windows Update components. The most common causes are:
- Update services stuck or malfunctioning (for example,
wuauservorBITS) - Corrupted update cache inside folders like
SoftwareDistributionandcatroot2 - Configuration bugs introduced by earlier preview/feature updates that leave the scanning logic in a bad state
In other words, your PC is contacting Microsoft’s update servers, but the internal “engine” that checks and prepares updates is jammed and never finishes the scan.
Microsoft’s Official Fix: Configuration Update KB5062324
Microsoft has released a special configuration update, KB5062324, specifically to fix the issue where the Windows 11 24H2 update scan does not complete.
Key points:
- KB5062324 targets the broken scanning logic in Windows Update for Windows 11 24H2.
- The fix is also bundled into newer cumulative updates starting with KB5058499 and all later 24H2 rollups (for example, KB5060842, KB5063060, and the latest security update KB5068861 as of November 2025).
- If your PC can already install the latest cumulative updates normally, you don’t need to install KB5062324 separately—the fix is included.
The problem is: if your PC is stuck on “Checking for updates…”, you might not be able to receive those newer cumulative updates automatically. That’s where a manual install comes in.
Fix #1: Manually Install the Recommended Update from Microsoft Update Catalog
If Windows Update won’t progress at all, you can download and install the fix manually using the Microsoft Update Catalog.
Step-by-step:
- Open your browser and go to the Microsoft Update Catalog.
- In the search box, type KB5062324. If that is not available for your exact build, you can search for a newer cumulative update that includes it, such as KB5058499 (preview) or later rollups like KB5068861 for Windows 11 24H2.
- Make sure you pick the correct entry for Windows 11, version 24H2 and the right architecture (usually x64-based systems).
- Click [Download] and save the
.msufile locally. - Double-click the
.msufile to start installation. - When prompted, restart your PC.
After the restart, go back to Settings → Windows Update and try [Check for updates] again. On most affected systems, the scan will now complete normally.
Tip: If the .msu file fails when run from a network share, copy it to your local drive first and run it from there—Microsoft notes known issues when using WUSA with updates like KB5058499 over network shares.
Fix #2: Use the Built-In Windows Update Troubleshooter
Before you dive into more advanced repair steps, it’s worth trying the Windows Update troubleshooter. It can automatically fix some common service and configuration problems.
Windows 11 (24H2 / 25H2):
- Go to Settings → System → Troubleshoot → Other troubleshooters
- Find Windows Update and click [Run]
- Follow the on-screen instructions and apply any fixes it suggests
- Restart your PC and try checking for updates again
The troubleshooter won’t fix everything (for example, it won’t install KB5062324 for you), but it’s a quick, safe first step.
Fix #3: Reset the Windows Update Cache (Advanced)
If the scan is still stuck after installing the recommended update—or if you can’t install it at all—resetting the Windows Update cache is a powerful next step. This method is similar to what Microsoft and community experts suggest on their forums.
1. Open Command Prompt as Administrator
- Right-click Start → choose Windows Terminal (Admin) or Command Prompt (Admin)
2. Run these commands one by one:
net stop cryptSvc
net stop bits
net stop msiserver
ren C:\Windows\SoftwareDistribution SoftwareDistribution.old
ren C:\Windows\System32\catroot2 catroot2.old
net start wuauserv
net start cryptSvc
net start bits
net start msiserver
What this does:
- Stops all core Windows Update services
- Renames (backs up) the existing
SoftwareDistributionandcatroot2folders - Restarts the services, forcing Windows to create fresh update cache data
When you’re done, restart your PC, then open Settings → Windows Update and click [Check for updates] again.
Hidden Tips and Extra Troubleshooting Tricks
Tip 1: Restart Update Services from the Services Console
If you don’t want to use the command line, you can try restarting update services from the graphical Services console.
- Press Win + R, type
services.msc, and press Enter - Scroll down and find:
- Windows Update
- Background Intelligent Transfer Service (BITS)
- Right-click each one and choose [Restart]
This method won’t fix a corrupted cache by itself, but it can resolve temporary hangs in the services.
Tip 2: Delete the SoftwareDistribution Folder via File Explorer
If you prefer a GUI method instead of commands, you can clear the main update cache folder manually. (Make sure you’ve stopped Windows Update and BITS first, or use the troubleshooter so the folder isn’t locked.)
- Open File Explorer and go to
C:\Windows\SoftwareDistribution - Select all files and folders inside and press Delete (admin rights may be required)
- Restart your PC
- Go back to Settings → Windows Update and click [Check for updates]
Windows will recreate the necessary folders and files automatically.
Tip 3: Use “Pause updates” Strategically
If you’ve tried several fixes and the scan is still unstable, it may help to pause updates temporarily, restart, and then resume later.
- Go to Settings → Windows Update
- Under “Pause updates”, choose Pause for 1 week
- Restart your PC
- After a day or two, return to the same screen and click “Resume updates”
Pausing can prevent repeated failing scans from running in the background while you’re working, giving you time to apply manual fixes like KB5062324.
Tip 4: Preventive Habits for Future Stability
To reduce the chances of running into the same problem again:
- Install new cumulative updates (like the latest KB5068861 for 24H2/25H2) as they are released to keep the update stack current.
- Don’t ignore slow or stuck scans—run the troubleshooter early.
- Use Storage Sense to keep temporary files under control so disks don’t get critically full during updates.
- Create a System Restore Point or backup image before major feature updates.
Summary Table: Symptoms and Recommended Fixes
Here’s a quick overview of the most common situations and what to try first:
| Situation | Recommended Fix | Notes |
|---|---|---|
| “Checking for updates…” never finishes on Windows 11 24H2 | Manually install KB5062324 or a newer cumulative update that includes it (e.g., KB5058499 or later) from the Microsoft Update Catalog | Microsoft’s documented fix for the stuck scan bug |
| Update services seem stuck | Restart Windows Update and BITS from services.msc | Fast, low-risk step—no files deleted |
| Cache corruption suspected | Reset update cache using the command-line method or delete SoftwareDistribution contents | Windows will rebuild fresh cache after restart |
| Scan still broken after fixes | Run the Windows Update troubleshooter | Can automatically repair some service/config issues |
| Repeated failures, you’re busy right now | Use Pause updates for a short time, then resume later | Buys time while you prepare backups or manuals fixes |
Final Thoughts: Don’t Live with a Broken Update System
If your Windows 11 PC is endlessly stuck on “Checking for updates…”, you’re most likely running into a known Windows 11 24H2 bug rather than a random one-off glitch. The problem is annoying, but it’s fixable.
Start with Microsoft’s own recommendation—manually install KB5062324 or a cumulative update that contains it. If that isn’t enough, reset the update cache, restart the key services, and run the troubleshooter.
Taking action early not only saves you frustration, but also ensures your PC continues to receive critical security and reliability updates. When Windows Update works properly, you don’t have to think about it—and that’s exactly how it should be.
💡 Looking for more tips? Check out our full list of Windows Help Guides.