1")
For a while, Windows 11 had a surprisingly “native” way to run Android apps: Windows Subsystem for Android (WSA), paired with the Amazon Appstore on Windows 11. It wasn’t perfect, but it was official—and it made Android apps feel like a real part of Windows.
That era is over.
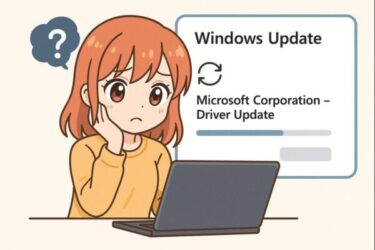
Microsoft ended support for WSA on March 5, 2025, and the Amazon Appstore on Windows 11 was discontinued after that date.
If you landed here after searching things like:
- “Windows 11 Android apps after WSA”
- “WSA discontinued what now”
- “How to install Android apps on Windows 11”
…you’re not alone.
The good news: you still have practical, realistic options in 2026. But the “best” option depends on what you actually want to do—gaming, productivity, messaging, or occasional access to one specific Android-only app.
This guide explains the most reliable ways to use Android apps on Windows 11 after WSA, with step-by-step setup, safety tips, and a quick decision guide so you don’t waste time installing the wrong thing.
- 1 What happened to Android apps on Windows 11?
- 2 The best ways to use Android apps on Windows 11 after WSA (ranked)
- 3 Step 1: Decide what you actually want to do (this saves hours)
- 4 Option A: Run Android apps using an emulator (BlueStacks method)
- 5 Step-by-step: How to install Android apps on Windows 11 with BlueStacks
- 6 Safety checklist: use emulators without regrets
- 7 Can you sync data between a PC emulator and your Android phone?
- 8 Option B: Google Play Games on PC (official Android games on Windows)
- 9 Option C: Phone Link app streaming (Android phone + Windows 11 together)
- 10 Option D: Use Web / PWA / Windows alternatives (often the smartest move)
- 11 Troubleshooting: common problems and quick fixes
- 12 What about iPhone users?
- 13 Which option should you choose? (quick decision guide)
- 14 Final thoughts: Android apps on Windows 11 aren’t gone—they just changed shape
What happened to Android apps on Windows 11?
WSA reached end-of-support
WSA (Windows Subsystem for Android) officially reached end-of-support on March 5, 2025.
Amazon Appstore on Windows 11 was discontinued
Because WSA was the engine that made it possible, the Amazon Appstore on Windows 11 is no longer supported after March 5, 2025.
Can WSA still run if it’s already installed?
In some cases, it may still run on PCs where it was installed before the cutoff. But once a platform is out of support, it stops receiving security fixes and compatibility updates—so keeping it long-term becomes a risk (especially if you sign into accounts inside it).
Practical takeaway:
After WSA, most people end up choosing one of these paths instead:
- Android emulators (best overall for “I need Android apps on PC”)
- Google Play Games on PC (best for supported Android games)
- Phone Link app streaming (best if you already have an Android phone)
- Web / PWA / Windows alternatives (best for productivity + safety + speed)
The best ways to use Android apps on Windows 11 after WSA (ranked)
Here’s the quick overview (then we’ll go step-by-step):
Option A — Android emulator (best overall)
Use tools like BlueStacks (or other reputable emulators) to run Android apps inside a virtual Android environment on your PC.
- Best for: Android-only apps, games, social apps, testing, multi-account use
- Tradeoffs: uses more CPU/RAM; setup can be slightly technical
Option B — Google Play Games on PC (best for supported Android games)
Google’s official PC client runs supported Android games on Windows, with a PC-friendly experience.
- Best for: mobile games that are supported in Google Play Games on PC
- Tradeoffs: not for general apps; you can’t just install any Android APK
Option C — Phone Link app streaming (best if you already have an Android phone)
Keep the app running on your phone and view/control it on your PC (device support varies). Phone Link has continued to expand app streaming features in Windows 11, including an “expanded screen” experience rolling out via the Microsoft Store.
- Best for: messaging, verification codes, quick “phone app” access from your desk
- Tradeoffs: requires an Android phone; some features are limited to specific models
Option D — Web apps / PWA / Windows alternatives (best for productivity and safety)
Many “Android apps” are really services that work great in a browser—or have a proper Windows app. Installing a site as a PWA often gives you the “app feel” without emulation.
- Best for: email, notes, cloud storage, social media, productivity tools
- Tradeoffs: not all features match the mobile app
Step 1: Decide what you actually want to do (this saves hours)
Most frustration comes from choosing the wrong tool first.
If your goal is… playing Android games
- Try Google Play Games on PC (cleanest experience if your game is supported)
- If your game isn’t supported → use an emulator (BlueStacks is a common choice)
If your goal is… running a specific Android-only app
Start with an emulator. That’s the closest replacement for “Android apps on Windows.”
If your goal is… using your phone apps on PC occasionally
Try Phone Link. It’s often enough for messages, notifications, verification codes, and quick app access (and it avoids running a full Android system on your PC).
If your goal is… chat + work + reliability
Check for a web/PWA or Windows app first. It’s usually the simplest, safest, and fastest.
Option A: Run Android apps using an emulator (BlueStacks method)
What is an Android emulator?
An emulator creates a virtual Android device inside Windows. You install apps (often via Google Play) and use them like you would on a phone—except with a keyboard, mouse, and a larger screen.
Why emulators are the #1 WSA replacement
Because they:
- don’t rely on WSA
- work with many Android apps
- often support multiple Android versions
- can run multiple instances (useful for testing, multi-account games, or separated work/personal setups)
Recommended emulator: BlueStacks (popular + widely documented)
BlueStacks is one of the most common Android app players on Windows, with extensive help docs and troubleshooting guides.
Minimum requirements (baseline)
BlueStacks lists minimum requirements such as:
- Windows 7+ (Windows 10/11 supported)
- Intel/AMD CPU
- At least 4GB RAM
- At least 5GB free disk space
Those are the “it runs” specs—not always the “it runs well” specs. For a smoother experience, an SSD and more RAM make a noticeable difference.
Step-by-step: How to install Android apps on Windows 11 with BlueStacks
1) Download BlueStacks from the official site
Avoid “free download” mirror sites. If an installer is bundled with extra tools you didn’t ask for, that’s a red flag.
- Go to the BlueStacks official website
- Download the latest BlueStacks installer
- Install like a normal Windows application
2) Enable virtualization (VT) if needed
Most emulators run best (and sometimes only run properly) when CPU virtualization is enabled.
Quick check (easy method)
- Press Ctrl + Shift + Esc to open Task Manager
- Open the Performance tab
- Click CPU and look for Virtualization: Enabled
If it’s disabled, you may need to enable it in BIOS/UEFI.
If BIOS settings make you nervous, go slow and search your PC brand’s steps (Dell / HP / Lenovo / ASUS, etc.). Most systems treat this as a simple toggle.
3) Sign in to Google Play (optional but recommended)
Many apps install and update cleanly through Google Play, and it’s often safer than random APK download sites.
Extra-safety tip:
If you’re cautious, create a dedicated Google account for emulator use (especially if you plan to test apps or install experimental tools).
4) Install apps and run them
Open Google Play, search the app, install, and launch.
5) Make it feel more “Windows-native”
To reduce friction in daily use:
- Create shortcuts (some emulators let you pin app shortcuts to Start or the taskbar)
- Enable keyboard mapping (especially for games)
- Tune performance settings: CPU cores, RAM allocation, graphics mode (DirectX/OpenGL), FPS limits
Safety checklist: use emulators without regrets
Emulators themselves can be safe. The biggest risks usually come from where you download them and what you install inside them.
Do this:
- Download only from official websites
- Keep Windows Security / antivirus enabled
- Stick to Google Play when possible (clean updates, fewer surprises)
- Use a dedicated Google account for emulator/testing if you want extra separation
Avoid this:
- “Modded APK packs” from unknown sites
- Installers that bundle “helper” programs you didn’t ask for
- Granting Accessibility permissions to unknown apps (even inside an emulator—this can be abused)
Can you sync data between a PC emulator and your Android phone?
Yes—often.
It depends on how the app stores data:
- Cloud account-based apps (Google, Meta, X, Microsoft, etc.)
→ usually sync smoothly across phone + emulator + browser - Apps that store data locally with no account sign-in
→ usually won’t sync unless they support export/import - Games
→ sync only if they support cloud save or account linking (Google Play Games, Facebook, publisher accounts)
Important:
Some competitive games restrict emulator use. If a game is online and competitive, check its rules before investing time.
Option B: Google Play Games on PC (official Android games on Windows)
If you mainly care about Android games, Google’s official solution can be simpler than a full emulator setup.
What it is
Google Play Games on PC is Google’s official Windows app that lets you play supported Android games on PC.
Minimum requirements (important before you try)
Google checks your PC during installation. Minimum requirements include things like:
- Windows 10 (v2004) or later
- SSD with at least 10GB free space
- 8GB RAM
- 4 physical CPU cores
- Hardware virtualization enabled
(Requirements may evolve over time, so it’s worth checking the official page if installation fails.)
Why this can be better than emulators (for games)
- It’s official
- Setup is usually straightforward if your PC qualifies
- Game compatibility is cleaner (when supported)
- Often fewer “tuning” settings than emulators
The big limitation
It’s not a general Android environment. It’s focused on supported games, not “install anything like a phone.”
Option C: Phone Link app streaming (Android phone + Windows 11 together)
If you already own an Android phone, you may not need to “run Android apps on Windows” at all.
Sometimes it’s enough to use your phone apps from your PC—especially for messages, codes, and quick workflows.
What Phone Link does
Phone Link connects your Android phone and Windows PC. Depending on your device, you can:
- see phone notifications on PC
- send/receive texts
- access recent photos
- on supported devices, stream apps / mirror screens (features vary)
Microsoft’s setup guidance includes requirements like Windows 11 (or modern Windows 10) and Android 8.0+ (with Android 10+ recommended for best experience).
A useful 2026 upgrade: bigger “app streaming” view
Phone Link’s Android app streaming has been improving, including an “expanded screen” style view rolling out via the Microsoft Store (still dependent on supported phones).
Why Phone Link is great
- No emulation overhead
- Uses your phone’s real apps and logins
- Perfect for messaging + quick codes + light workflows
- Often feels more “natural” than running a full virtual Android device
Limitations
- Features depend on phone brand/model and your Phone Link version
- App streaming/mirroring isn’t universal across all Android phones
- Some notifications/features may be restricted by Android privacy/security changes
Option D: Use Web / PWA / Windows alternatives (often the smartest move)
This option sounds boring—but it’s the most underrated.
A lot of what people call “Android apps” are really services that already work well as:
- a web version
- a desktop app
- or a PWA (installable web app)
Why this is often better than Android emulation
- Faster to launch
- Safer (fewer “unknown installers”)
- Uses fewer system resources
- Updates automatically
- Works across Windows, Mac, iPhone, Android
Examples where web/PWA is a win
- Gmail, Google Calendar, Google Docs
- Notion, Trello, Slack
- Instagram / X (web)
- Most banking portals (web)
- Cloud storage: Google Drive, Dropbox, OneDrive
Quick tip: install as a PWA
In Chrome/Edge you can often do:
- Menu → Install app (or Apps → Install this site as an app)
- It becomes a windowed “app” with its own icon
- It feels much closer to a native application
Troubleshooting: common problems and quick fixes
Problem 1: Emulator feels slow or stutters
Try these in order:
- Enable virtualization (VT) in BIOS/UEFI
- Close heavy apps (too many browser tabs, video editors, other games)
- Increase emulator RAM/CPU allocation (don’t max it out—leave Windows breathing room)
- Switch graphics mode (DirectX vs OpenGL in emulator settings)
- Update GPU drivers
Problem 2: “Cannot start” or virtualization conflicts (Hyper-V)
Some emulators conflict with certain Windows virtualization features. Others offer a Hyper-V compatible mode/version.
- Update the emulator to the latest version
- Check the emulator’s guidance for Hyper-V / Windows Hypervisor Platform settings
- If the emulator offers a “Hyper-V compatible” build, use that version instead
(Emulators differ here—follow their official docs rather than random forum commands.)
Problem 3: Google Play won’t sign in (inside emulator)
Try:
- Confirm date/time are correct (wrong time can break sign-in)
- Clear Play Store cache (inside Android settings)
- Create a fresh emulator instance/profile
- Try a different Google account temporarily (to isolate account vs emulator issues)
Problem 4: App crashes immediately
Try:
- Switch to a different Android version instance (some apps behave differently)
- Update the emulator
- Check whether the app blocks emulators (some banking/streaming/competitive apps do)
- Use a web/PWA alternative instead (often the cleanest fix)
What about iPhone users?
If you’re an iPhone user and you want Android apps on Windows 11, you have two realistic paths:
1) Use an emulator (best option)
Because you don’t have an Android device for Phone Link’s Android app streaming features.
2) Use web/PWA versions instead
This covers a surprisingly large portion of what people want—especially for productivity and messaging.
Recommendation:
If you’re iPhone-only, start with web/PWA for daily tools and use an emulator only when you truly need an Android-only app.
Which option should you choose? (quick decision guide)
Choose an emulator if:
- you need Android apps (not just games)
- your app is Android-only
- you want a full Android environment on Windows 11
Choose Google Play Games on PC if:
- your goal is playing supported Android games
- you want official stability and a cleaner gaming-focused setup
Choose Phone Link if:
- you already have an Android phone
- you want practical daily workflows (texts, photos, notifications, quick app access)
Choose web/PWA if:
- your goal is productivity, messaging, and cloud services
- you want the simplest and safest approach
Final thoughts: Android apps on Windows 11 aren’t gone—they just changed shape
WSA ending feels like a loss, but most people weren’t using WSA daily. What they actually wanted was:
- run one specific app
- play a mobile game on a bigger screen
- reply to messages from PC
- sync notes and files across devices
You can still do all of that today—just with different tools.
If you want one “best default” choice:
Start with web/PWA (fastest + safest), then add an emulator only when you truly need a specific Android-only app.
And if you already have Android hardware, Phone Link is often the most comfortable “bridge” between your phone and your Windows PC.
Recommended Article
・App Disappeared After Windows Upgrade? Here’s Why and How to Get It Back
・10 Windows Settings You Should Disable Immediately
・How to Share Files Between Your Windows PC and Android/iPhone
Recommended Article
・App Disappeared After Windows Upgrade? Here’s Why and How to Get It Back
・10 Windows Settings You Should Disable Immediately
・How to Share Files Between Your Windows PC and Android/iPhone