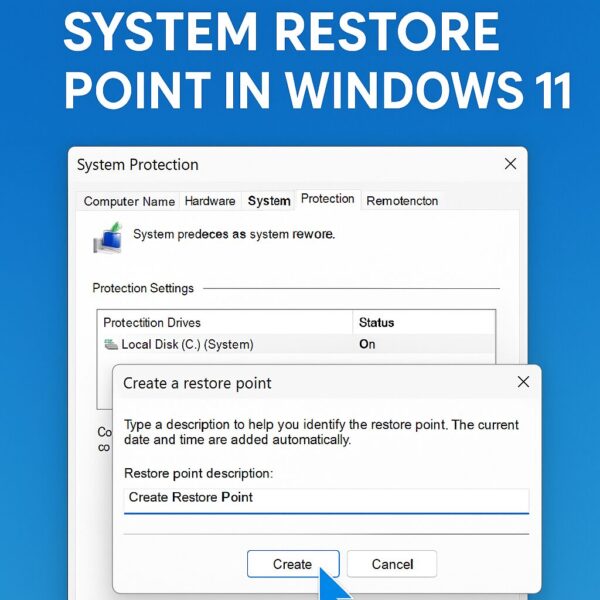
Windows 11 is generally stable, but unexpected problems can still happen after a big update, a new driver installation, or a software change. That’s where System Restore comes in. A restore point saves your system files and settings at a specific moment in time. If something breaks later, you can roll your PC back to this saved state — like an “undo” button for your operating system.
Importantly, System Restore does not delete your personal files, like photos, videos, or documents. It only affects Windows settings, drivers, registry entries, and installed programs. For many beginners, this is one of the easiest ways to protect your PC without using third-party backup tools.
What Is a Restore Point?
A restore point is essentially a snapshot of your Windows configuration. It includes:
- System files and Windows registry settings.
- Installed drivers and programs.
- System-level configurations.
You can create these points manually or let Windows create them automatically (e.g., before a major update). When things go wrong — blue screens, failed updates, or broken drivers — you can restore your PC to this earlier point without reinstalling Windows.
How to Create a System Restore Point in Windows 11 (Step-by-Step)
Follow these steps to create your first restore point:
Step 1: Open the System Protection Settings
- Click the Start button and type: “Create a restore point.”
- Select the result with a small computer icon labeled System Properties.
This opens the System Properties window directly to the System Protection tab.
Tip: Pin this tool to your Start menu or taskbar if you plan to use it frequently.
Step 2: Turn On Protection (If It’s Disabled)
- In the Protection Settings section, find your system drive (usually C:).
- If the Protection column says “Off,” click Configure.
- Select Turn on system protection and adjust the Max Usage slider (5–10% of your drive is enough for most users).
- Click OK to save the settings.
(Insert screenshot here: System Properties window with the Configure option highlighted)
Step 3: Create the Restore Point
- Back in the main System Protection tab, click Create.
- Type a descriptive name (e.g., “Before installing NVIDIA driver” or “Pre-Windows Update”).
- Click Create again. Windows will take a few moments to generate the restore point.
- When finished, you’ll see a confirmation message.
(Insert screenshot here: Create Restore Point dialog box with name field)
How to Use a Restore Point (Optional but Useful)
If you ever need to roll back your PC:
- Go to the same System Protection tab.
- Click System Restore.
- Choose the restore point you created and follow the on-screen instructions.
Windows will reboot and revert your system settings to the saved state.
Best Practices and Tips
- 💡 Always create a restore point before installing big updates, major driver changes, or unknown software.
- System Restore is not a substitute for full backups. Use cloud storage or external drives for your personal files.
- Older restore points are deleted automatically when space runs out, so keep an eye on available disk space.
- Combine System Restore with Windows Backup & Restore or File History for maximum safety.
Make a full backup of your files with a reliable portable drive.
View on Amazon[Affiliate Disclosure] Some links below are affiliate links. If you purchase through them, we may earn a small commission at no extra cost to you. Thank you!
Common Questions (FAQ)
1. Does a restore point delete my personal files?
No. It only affects system files, registry settings, installed drivers, and programs. Your documents and photos remain untouched.
2. How long does it take to create a restore point?
Usually less than 1–2 minutes, depending on your drive speed and system size.
3. How much space does System Restore need?
5–10% of your system drive is typical. You can adjust this in the Configure menu.
4. Can I schedule automatic restore points?
Windows automatically creates restore points before major updates and drivers, but you can also use Task Scheduler for custom automation.
Conclusion
Creating a system restore point in Windows 11 is one of the simplest ways to protect your PC. It’s quick, free, and can save hours of troubleshooting if something breaks. For beginners, this is an essential habit — think of it as an “insurance policy” for your system.
Make a restore point today, especially before big updates or software installs. It could save your Windows 11 PC when you least expect it.
[Affiliate Disclosure] Some links below are affiliate links. If you purchase through them, we may earn a small commission at no extra cost to you. Thank you!
Create full file backups alongside System Restore for maximum safety.
View on AmazonProtect key folders with automatic cloud backup + Office apps.
View on AmazonRecommended Articles
▶︎How to Check Your IP Address in Windows 11 (Beginner Guide)
▶︎How to Show File Extensions in File Explorer (Beginner-Friendly)
▶︎How to Use Windows System Restore Points — A Complete Beginner’s Guide (2025 Updated)


