1")
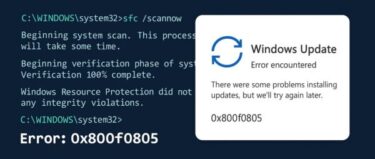
If Windows Update fails with errors like 0x800f0922 or shows messages such as “Can’t update Windows RE”, your Recovery (WinRE) partition may be too small.
This is a common issue, especially on systems upgraded from Windows 10.
In this guide, you’ll learn:
- What the Recovery partition does
- Why it runs out of space
- Safe and proven ways to fix it
- 1 What Is the Recovery (WinRE) Partition?
- 2 Why the Recovery Partition Runs Out of Space
- 3 Before You Start (Important)
- 4 Quick Decision Guide
- 5 Step 1: Check Your Disk Layout
- 6 Method 1: Extend the Recovery Partition (Recommended)
- 7 Method 2: Recreate the Recovery Partition (Advanced)
- 8 Method 3: Temporary Workaround
- 9 After Fixing (Important)
- 10 FAQ
- 11 Conclusion
What Is the Recovery (WinRE) Partition?
The Recovery partition stores the Windows Recovery Environment (WinRE), which allows you to:
- Repair startup problems
- Reset your PC
- Access advanced troubleshooting tools
- Roll back updates
👉 Without enough space, Windows cannot update WinRE — which can cause update failures.
Why the Recovery Partition Runs Out of Space
Most systems have a small Recovery partition (around 100–450MB).
However:
- WinRE updates require more space over time
- Security updates add new files
- Older layouts (from Windows 10 upgrades) are too small
👉 The real fix is NOT deleting files
👉 The correct fix is expanding the partition
Before You Start (Important)
Before making changes:
- Back up your important files
- Suspend BitLocker (if enabled)
- Use an administrator account
- Close all running apps
👉 Partition changes are usually safe, but backup is essential
Quick Decision Guide
| Situation | Best Method | Difficulty |
|---|---|---|
| Free space next to Recovery | Extend partition | Easy |
| Space not adjacent | Move partitions (tool needed) | Medium |
| Layout is broken | Recreate WinRE partition | Advanced |
Step 1: Check Your Disk Layout
Using Disk Management
- Press Windows + X → Disk Management
- Locate the Recovery partition
- Check if unallocated space exists next to it
👉 Important: Windows can only extend into space directly next to the partition
Check WinRE Status
Run:
reagentc /info
Make sure:
- WinRE is Enabled
- You know its current location
Method 1: Extend the Recovery Partition (Recommended)
Step 1: Shrink C:
- Open Disk Management
- Right-click C: → Shrink Volume
- Enter 1024MB (1GB)
👉 This creates unallocated space
Step 2: Move Space (if needed)
If the space is not next to Recovery:
👉 Use a partition tool to move it
Step 3: Extend Recovery Partition
- Right-click Recovery partition
- Select Extend Volume
- Add 500MB–1GB
Then:
- Restart PC
- Run
reagentc /infoagain
✔ Result
You’ve increased space for WinRE, preventing update failures.
Method 2: Recreate the Recovery Partition (Advanced)
Use this if:
- Extension fails
- Partition layout is messy
- WinRE is broken
Step 1: Disable WinRE
reagentc /disable
reagentc /info
Step 2: Shrink C:
Shrink by ~1GB (same as before)
Step 3: Create New Partition
Run:
diskpart
list disk
select disk 0
create partition primary size=1024
format quick fs=ntfs label="Recovery"
assign letter=R
set id=de94bba4-06d1-4d40-a16a-bfd50179d6ac
gpt attributes=0x8000000000000001
exit
Step 4: Copy WinRE Files
mkdir R:\Recovery\WindowsRE
copy C:\Windows\System32\Recovery\Winre.wim R:\Recovery\WindowsRE\
Step 5: Re-enable WinRE
reagentc /setreimage /path R:\Recovery\WindowsRE /target C:\Windows
reagentc /enable
reagentc /info
(Optional: remove drive letter)
diskpart
select volume R
remove letter=R
exit
Method 3: Temporary Workaround
If you need a quick fix:
reagentc /disable
Run Windows Update → then:
reagentc /enable
⚠ This is temporary only
After Fixing (Important)
- Run
reagentc /infoto confirm WinRE is enabled - Check Windows Update
- Re-enable BitLocker
- Create restore point
Recommended Partition Size
👉 Aim for 750MB–1GB or more
This prevents future update issues.
FAQ
Q. Can I delete files in the Recovery partition?
No. This may break recovery features.
Q. Why can’t I extend the partition?
Because space must be adjacent.
Q. Is this safe?
Yes, if you:
- Back up data
- Follow steps carefully
Conclusion
Recovery partition issues are common — especially after upgrades.
The best solution is to:
✔ Expand the partition
✔ Or recreate it if needed
Once fixed, Windows Update should work normally again.
Recommended Articles
▶︎ Fix: Drivers Not Loading After Windows Update (Memory Integrity Issue)
▶︎ C Drive Space Disappearing on Windows 11? 10 Real Causes and Fixes
▶︎ Windows PC Booting Too Slow? 7 Ways to Fix It for Beginners