- 1 Introduction
- 2 Why Does CPU Usage Reach 100%?
- 3 Step-by-Step Fixes for CPU 100% Problems
- 4 Intermediate Fixes (For Persistent Issues)
- 5 Advanced Optimization Tricks (For Power Users)
- 5.1 1. Adjust Virtual Memory (Page File)
- 5.2 2. Change Process Priority
- 5.3 3. Manage Browser Tabs and Extensions
- 5.4 4. Reschedule Background Tasks
- 5.5 5. Fine-Tune Registry (Advanced Users)
- 5.6 6. BIOS/UEFI CPU Settings
- 5.7 7. Processor Minimum State
- 5.8 8. Disconnect Faulty Peripherals
- 5.9 9. Reset or Reinstall Windows
- 6 When to Consider Upgrading Your PC
- 7 Recommended Tools & Hardware
- 8 Conclusion
Introduction
You’re working on your Windows PC, everything seems fine, and suddenly it freezes.
The mouse doesn’t move, the keyboard doesn’t respond, and nothing works until you force a restart.
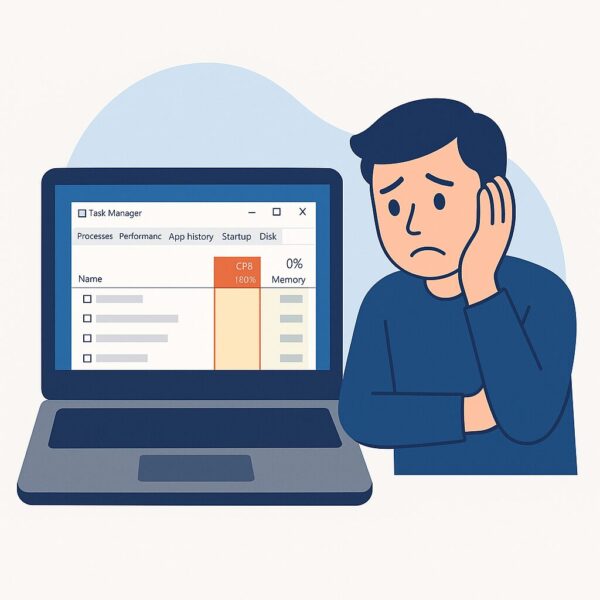
When you finally manage to open Task Manager, you notice one thing in common:
CPU usage is stuck at 100%.
What’s confusing is that your disk still has plenty of free space. So why does the system freeze?
This article explains the real reasons why your CPU usage reaches 100% and how to fix it on both Windows 10 and Windows 11. From basic troubleshooting steps to advanced optimization tricks, we’ll cover everything you need to know to make your PC stable again.
Why Does CPU Usage Reach 100%?
Even if you have a large SSD or HDD with lots of free space, your PC can still freeze because the CPU is overloaded. Here are the most common causes:
1. Too Many Background Applications
Apps like antivirus software, cloud storage clients (Google Drive, OneDrive, Dropbox), messaging apps (Discord, Teams, Slack), or game launchers (Steam, Epic Games Launcher) often run silently in the background, consuming CPU resources.
2. Windows Update or Security Scans
Windows frequently installs updates and performs background security scans. During these tasks, your CPU usage can spike, causing temporary freezes.
3. Outdated or Buggy Drivers
Old drivers, especially for graphics cards, printers, or audio devices, can cause CPU loops and overload the processor.
4. Thermal Throttling (Overheating)
When the CPU overheats, it lowers its speed to protect itself. This can create the illusion that the CPU is “stuck at 100%” while performance drops drastically.
Step-by-Step Fixes for CPU 100% Problems
Step 1: Identify the Culprit with Task Manager
- Press Ctrl + Shift + Esc to open Task Manager.
- In the Processes tab, click on the CPU column to sort by usage.
- Look for processes consuming unusually high CPU.
If you find one (e.g., Chrome, Windows Update, or an antivirus scan), you can decide whether to end the task or adjust its settings.
Step 2: Disable Unnecessary Startup Apps
- Open Task Manager → Startup tab.
- Right-click unnecessary apps (Spotify, Skype, Adobe Updater, etc.) → Disable.
This prevents them from running automatically and consuming CPU every time you boot your PC.
Step 3: Keep Windows and Drivers Updated
- Go to Settings → Update & Security → Windows Update and install all pending updates.
- Update GPU drivers (NVIDIA GeForce Experience or AMD Adrenalin).
- Update network or audio drivers from your PC manufacturer’s site.
Outdated drivers are often behind high CPU usage issues.
Step 4: Scan for Malware
Run a full scan with Windows Defender or a trusted antivirus (e.g., Malwarebytes).
Cryptominers and malicious scripts are notorious for maxing out CPU resources.
Step 5: Improve Cooling
- Clean dust inside the PC or laptop fans.
- Use a laptop cooling pad.
- Reapply thermal paste (advanced users).
Better cooling prevents thermal throttling and stabilizes CPU usage.
Intermediate Fixes (For Persistent Issues)
Adjust Your Power Plan
- Open Control Panel → Power Options.
- Select High Performance or create a custom plan.
This prevents Windows from throttling your CPU too aggressively.
Disable Unnecessary Services
- Press Win + R → services.msc.
- Identify services you don’t need (e.g., Print Spooler if you never print).
- Set them to Manual or Disabled.
⚠️ Be careful not to disable essential services.
Upgrade to SSD or Add RAM
- If you’re still on HDD, upgrading to SSD reduces system lag significantly.
- Adding more RAM (e.g., upgrading from 4GB to 8GB or 16GB) helps reduce paging and lowers CPU stress.
Advanced Optimization Tricks (For Power Users)
If your PC still struggles, try these advanced techniques:
1. Adjust Virtual Memory (Page File)
- Right-click This PC → Properties → Advanced System Settings.
- Under Performance → Settings → Advanced → Virtual Memory, adjust manually.
- Set it to 1.5–2x your RAM size for stability.
2. Change Process Priority
- Open Task Manager → Details tab.
- Right-click the high-usage app → Set Priority → Below Normal.
This allows other apps to remain responsive.
3. Manage Browser Tabs and Extensions
Chrome and Edge are CPU hogs if you have too many tabs.
- Close unused tabs.
- Disable heavy extensions (e.g., ad blockers with poor optimization).
- In Edge, enable Efficiency Mode under performance settings.
4. Reschedule Background Tasks
- Open Task Scheduler (Win + R → taskschd.msc).
- Find Windows Defender scans or update tasks.
- Change triggers to run at night or off-hours.
5. Fine-Tune Registry (Advanced Users)
Registry tweaks can change CPU scheduling and responsiveness.
⚠️ Always back up the registry first. Incorrect edits can break your system.
6. BIOS/UEFI CPU Settings
Enable or disable features like Intel Turbo Boost or AMD Precision Boost depending on your cooling capacity.
Updating BIOS can also improve CPU stability.
7. Processor Minimum State
- Go to Power Options → Advanced settings → Processor Power Management.
- Increase “Minimum Processor State” to 30–50%.
This prevents rapid clock fluctuations that cause stutter.
8. Disconnect Faulty Peripherals
A malfunctioning USB device or external HDD can create CPU spikes. Disconnect all peripherals and test again.
9. Reset or Reinstall Windows
If nothing works, reinstalling Windows often clears years of accumulated errors, restoring smooth CPU usage.
When to Consider Upgrading Your PC
If your PC is more than 5–7 years old, its CPU may simply be too weak for modern workloads. Signs you should consider upgrading:
- Frequent freezes even after all optimizations.
- CPU maxes out with just a browser and office apps.
- Laptop fans run at maximum speed constantly.
👉 A new PC will not only eliminate these freezes but also offer faster boot times, better security, and energy savings.
Recommended Tools & Hardware
🛠️ If you’re struggling with constant freezes, these upgrades can make a massive difference:
[Affiliate Disclosure] As an Amazon Associate, this site may earn from qualifying purchases.
Microsoft 365 Personal
Always up to date with Word, Excel, PowerPoint, Outlook, and more—plus 1TB of OneDrive cloud storage.A cost-effective choice compared to the one-time Office license, especially if you want seamless updates across devices.
Looking for a family plan? Search for Microsoft 365 Family to share with up to 6 people.
Conclusion
Even if your storage is plentiful, your PC can freeze when CPU usage spikes to 100%.
✔ Identify the culprit with Task Manager
✔ Disable startup apps and update drivers
✔ Scan for malware and improve cooling
✔ Adjust power settings, services, and virtual memory
✔ Upgrade hardware if necessary
By following these steps, you can prevent freezes, keep your system stable, and extend the life of your Windows 10/11 PC.
If nothing helps, it may be time to consider an upgrade. After all, no one wants to waste time fighting constant freezes when a smooth workflow is just a few adjustments (or a new PC) away.
Looking for more troubleshooting tips? Check out these guides:
・How I Fixed 100% Disk Usage on My Windows 11 Laptop (Fujitsu LIFEBOOK)
・Antimalware Service Executable Drains Your Laptop Battery? Here’s Why and How to Fix It Safely
・Is Your Laptop Overheating? Quiet Cooling Tips for Working in Public Spaces


