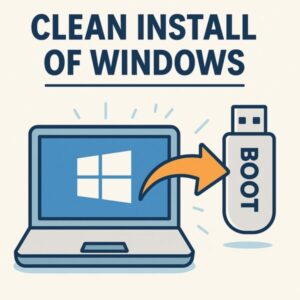
If your PC feels sluggish, throws random errors, or keeps acting up after major Windows updates, a clean install can give it a true fresh start. Done right, it wipes years of cruft, unstable drivers, and broken settings; done carelessly, it can cause data loss or BitLocker lockouts. This guide walks you through everything—from prep to post-install—clearly and safely, without screenshots.
What Is a Clean Install?
A clean install erases the Windows system partition and reinstalls Windows from scratch. Think of it as a factory reset you control: you remove leftover files, problematic drivers, and legacy tweaks, then rebuild only what you need.
When a Clean Install Makes Sense (in 2025)
| Situation | Why it helps |
|---|---|
| System instability (crashes, freezes) | Resets corrupted services, drivers, and tangled settings |
| Post-malware cleanup | Eliminates lingering payloads and policy changes |
| Heavy storage clutter | Removes years of leftovers; restores a known-good baseline |
| Post-update issues (e.g., 24H2/25H2) | Fixes broken transitions, incompatible drivers, and setup conflicts |
| Before resale/hand-off | Securely wipes personal data |
Preparation: Do These Before You Install
1) Back Up Your Data (and Keys)
Copy important files to an external drive or trusted cloud (OneDrive/Google Drive). Don’t forget:
- Photos, documents, project folders
- License keys (Office/Adobe) and app settings
- Outlook PST/IMAP settings if applicable
- Wi-Fi SSID/password
- Browser bookmarks/password export (Edge/Chrome)
If BitLocker/device encryption is enabled, make sure you have the recovery key. On Microsoft-account PCs, keys are typically backed up to your account; confirm before wiping.
2) Check Activation Status (Digital License)
Most Windows 10/11 devices use a digital license tied to your hardware. After a clean install and an internet connection, Windows usually re-activates automatically (Settings → System → Activation).
If you still want to see the embedded OEM key, you can try PowerShell:
(Get-WmiObject -query ‘select * from SoftwareLicensingService’).OA3xOriginalProductKey
(Not all devices expose a readable key. That’s normal—digital licenses typically reactivate on their own.)
3) Create Installation Media
You’ll need: a working Windows PC, an 8GB+ USB drive, and Microsoft’s tools. Download from Microsoft’s Windows 11 page (shows the 2025 Update, Version 25H2).
- Open Microsoft’s Download Windows 11 page and use the Installation Assistant or Create Windows 11 Installation Media to make a bootable USB.
- Alternatively, download the ISO and write it to USB with your preferred utility.
- Label the USB (e.g., “WIN11-SETUP”) so you can recognize it in UEFI/BIOS.
Tip: On some older boards, booting from a USB 2.0 port is more reliable during setup.
Clean Install: Step-by-Step
Step 1: Boot from the USB Installer
- Shut down the PC.
- Power on and immediately press the UEFI/BIOS key (F2, F12, Esc, or Delete—varies by brand).
- In the Boot menu, set your USB to top priority.
- Save and exit to boot from USB.
💡 Check your manufacturer’s support page for the exact UEFI/BIOS access key.
Step 2: Run Windows Setup
- Select language/keyboard → click Install now.
- Enter a product key or choose I don’t have a product key (you can activate later via digital license).
- Select the edition that matches your license if prompted.
- Choose Custom: Install Windows only (advanced).
- On the drive list:
- Select existing system partitions and click Delete.
- Highlight the unallocated space → click New → Next.
- Setup copies files and reboots. Expect ~30–60 minutes on typical SSD systems.
⚠️ Be absolutely sure you’re deleting the correct drive/partition set. Match by size and where Windows was previously installed.
Common Install Hurdles (and Quick Fixes)
| Symptom | Quick fix |
|---|---|
| Drive not detected | Use Load driver in Setup; supply storage drivers from USB |
| Setup freezes/errors | Recreate USB, try another port, check disk/RAM with vendor tools |
| Product key rejected | Skip entry; activation often completes via digital license after sign-in |
| No network after install | Install LAN/Wi-Fi driver from the PC maker via a second USB |
| Devices missing drivers | Install chipset/graphics/audio drivers from the manufacturer’s site |
Initial Setup Checklist (Post-Install)
- Connect to Ethernet/Wi-Fi and sign in (Microsoft account recommended)
- Run Windows Update repeatedly until fully current (25H2 shows on Microsoft’s download page).
- Install motherboard/chipset, graphics, audio, and touchpad drivers
- Reinstall apps and restore data
- Enable BitLocker (Pro/Enterprise) or device encryption and verify recovery key backup
Tip: Scan restored files with antivirus to avoid re-introducing malware.
Extra Safety & Pro Tips (2025)
Try “Reset this PC” Before Wiping
Go to Settings → System → Recovery → Reset this PC. Choose Keep my files or Remove everything. It’s not as thorough as a clean install, but often resolves common issues without external media. Note: a Reset bug reported in Aug 2025 was later addressed in Windows updates; keeping current mitigates it.
Secure Boot / TPM: When to Toggle
If the PC refuses to boot your USB, you may temporarily disable Secure Boot in UEFI, install Windows, then re-enable it afterward. TPM doesn’t usually block installs, but it’s required for features like BitLocker. (Windows 11’s official download page provides the current tools and requirements.)
BitLocker & Auto-Encryption Awareness
On modern Windows 11 builds (24H2+), device encryption/BitLocker may enable by default during setup with a Microsoft account, backing up the recovery key automatically. Verify your key is saved before and after install to avoid lockouts.
FAQ
Q. Can I recover files after a clean install?
Generally, no. A clean install deletes user data. Always back up first.
Q. Will Windows re-activate automatically?
Usually yes—most PCs reactivate via digital license once online (Settings → System → Activation).
Q. Do manufacturer (OEM) PCs support this?
Yes. You might need to install OEM drivers post-setup for full functionality (chipset, audio, touchpad, etc.).
Summary
Quick recap: the safest, cleanest path to a fresh Windows environment.
| Step | Key action |
|---|---|
| 1 | Back up files, app licenses, and your BitLocker recovery key |
| 2 | Create Windows 11 USB (Installation Media/ISO) |
| 3 | Boot from USB via UEFI/BIOS |
| 4 | Choose “Custom install”, delete old partitions, install fresh |
| 5 | Post-install: Update, drivers, apps, encryption, and restore data |
A thoughtful clean install is one of the most effective ways to fix deep Windows issues and reclaim performance—just prepare carefully, confirm what you’re erasing, and follow the steps above.
✔️ You might also find these helpful:

![How to Clean Install Windows 11 Safely (Step-by-Step Guide) 2 [Solved] 5 Practical Ways to Open Large CSV Files Faster in Excel (Without Crashes)](https://kimiyoya.com/wp-content/uploads/2025/06/9645C06E-7812-45EA-A4C1-A815B895E3AC.jpg)

