Keeping the correct system time and date is more important than most people realize. On Windows 11 (and Windows 10 as well), the system clock affects not only how your files are timestamped but also whether you can install updates, browse the web securely, and even run certain applications. If the clock is off—even by a few minutes—you may experience login failures, certificate errors, or syncing issues with email and cloud services.
This guide explains how to adjust the time and date on your Windows 11 computer, both manually and automatically, with extra troubleshooting tips and hidden tricks to keep your system clock accurate at all times.
Why the Correct Time and Date Matters
Before we dive into the steps, let’s quickly cover why having an accurate clock is so critical:
- Windows Updates: The update system checks timestamps to ensure packages are valid. Wrong time = update errors.
- Security Certificates: Websites and apps rely on SSL/TLS certificates. If your PC’s clock is wrong, you may see “Your connection is not private” errors.
- File Management: Backups, logs, and saved files all use your system clock. Incorrect time can confuse version history or cause data corruption in synced folders.
- Scheduled Tasks: Windows Task Scheduler, reminders, and apps like Outlook all depend on correct timing.
- Communication Apps: Zoom, Teams, and cloud services may refuse to connect if your clock is significantly off.
Quick Method: Adjust from the Taskbar
- Right-click the time in the bottom-right corner of the taskbar.
- Select Adjust date and time.
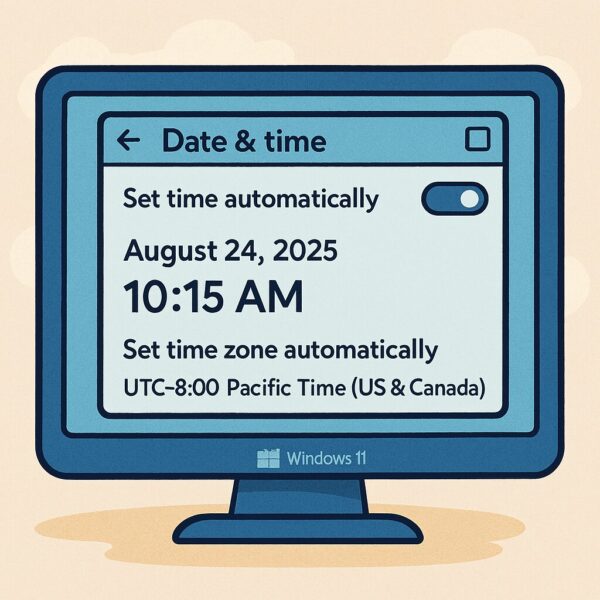
This opens the Date & time settings page in Windows Settings.
Automatic vs. Manual Time Settings
Method 1: Use Automatic Time Synchronization (Recommended)
- In Settings > Time & language > Date & time, toggle Set time automatically → On.
- Make sure Set time zone automatically is also enabled if you frequently travel or use VPNs.
- Windows will now sync your clock with Microsoft’s time servers.
💡 Tip: If you notice delays, scroll down and click Sync now under Additional settings > Sync your clock to force an update.
Method 2: Manually Set the Time and Date
Sometimes automatic syncing fails, or you need a custom clock for testing.
- Toggle Set time automatically → Off.
- Under Set the date and time manually, click Change.
- Enter your desired date and time, then click Change to apply.
Adjusting the Time Zone
If your time keeps shifting by hours, your time zone may be wrong:
- In Date & time settings, check the Time zone dropdown.
- Select the correct region (e.g., UTC+09:00 Osaka, Sapporo, Tokyo for Japan).
- Optionally, enable Adjust for daylight saving time automatically if you live in a region that observes DST.
Advanced Tricks and Troubleshooting
1. Force Sync with a Time Server (w32tm Command)
If your clock still drifts:
- Open Command Prompt as Administrator.
- Run:
- This forces an immediate synchronization.
You can also change the server with:
2. Change the Time Server (Internet Time Settings)
- Press Win + R, type timedate.cpl, and hit Enter.
- Go to the Internet Time tab.
- Click Change settings → check Synchronize with an Internet time server.
- Try servers like:
- time.windows.com
- time.nist.gov
- pool.ntp.org (community NTP pool)
3. Check CMOS Battery (For Desktop PCs and Older Laptops)
If your clock resets every time you restart, the small CMOS battery on your motherboard may be failing.
- Replace the CR2032 coin-cell battery (inexpensive, available at electronics stores).
- After replacement, reconfigure your BIOS/UEFI time once, and Windows will stay accurate.
4. Fix VPN or Dual-Boot Time Issues
- VPN Users: Some VPNs force a different time zone. After disconnecting, manually resync your time.
- Dual Boot (Windows + Linux): Linux often writes the hardware clock in UTC, while Windows assumes local time. To fix:
- In Linux, run timedatectl set-local-rtc 1.
- Or in Windows Registry:
- Navigate to HKEY_LOCAL_MACHINE\SYSTEM\CurrentControlSet\Control\TimeZoneInformation
- Add a new DWORD (32-bit) called RealTimeIsUniversal and set its value to 1.
5. Reset the Windows Time Service
If automatic syncing is broken:
- Open Services (Win + R → services.msc).
- Find Windows Time.
- Right-click → Restart.
- Ensure Startup type is set to Automatic.
Pro Tips for Power Users
- Group Policy Control: On Windows Pro/Enterprise, open Group Policy Editor (gpedit.msc) and navigate to:
Computer Configuration > Administrative Templates > System > Windows Time Service
Here, you can enforce stricter NTP settings. - Use Third-Party Tools: Tools like NetTime or Meinberg NTP provide more reliable synchronization if you manage multiple PCs.
- Event Logs: To troubleshoot syncing issues, check Event Viewer > Windows Logs > System, filter by “Time-Service”.
Common Problems and Fixes
| Problem | Possible Cause | Fix |
|---|---|---|
| Time keeps resetting after shutdown | Dead CMOS battery | Replace the CR2032 coin-cell battery, then set time in BIOS/UEFI once. |
| Time changes after connecting VPN | VPN forces a different region/time zone | Turn off “Set time zone automatically,” pick the correct zone, and click Sync now after disconnecting. |
| “An error occurred while Windows was synchronizing” | Firewall/router blocking NTP (UDP 123) or flaky NTP server | Allow UDP port 123, try another server (e.g., time.windows.com, time.nist.gov, pool.ntp.org), then run w32tm /resync. |
| Wrong time after dual boot | Windows expects local time; Linux writes RTC as UTC (or vice versa) | Either set Linux to local time (timedatectl set-local-rtc 1) or set Windows to UTC via registry (RealTimeIsUniversal=1). |
| Time zone keeps changing | Automatic time zone mis-detect (GPS/VPN/virtual location) | Disable “Set time zone automatically” and manually select the correct time zone. |
If your computer clock resets frequently, it may be time to replace the CMOS battery or keep reliable tools for easy maintenance.
Some links are affiliate links. We may earn a commission at no extra cost to you.
When to Seek Help
If your system clock continues to drift even after trying the above:
- Run a malware scan (some malware tampers with system time).
- Check your BIOS/UEFI firmware for updates.
- Contact your IT admin if you’re on a corporate network with group policies controlling time.
Final Thoughts
Changing the system time and date in Windows 11 is simple—but keeping it accurate can sometimes require deeper troubleshooting. For most users, enabling Set time automatically and ensuring the correct time zone is all that’s needed.
If problems persist, advanced steps like changing NTP servers, replacing the CMOS battery, or tweaking registry settings can bring your PC back to normal. By maintaining an accurate clock, you ensure smooth updates, secure browsing, and error-free communication across your apps.
Now you know not just how to change your system time and date, but also how to fix hidden issues that cause clocks to drift.
✔️You might also find these helpful:
▶︎How to Change Your Desktop Wallpaper in Windows 11
▶︎How to Automatically Sign In to Windows 11
▶︎How to Stop Unwanted Pop-ups and Notifications in Windows
💡 Looking for more tips? Check out our full list of Windows Help Guides.


