- 1 How to Fix Realtek Audio RPC Error: No Sound on Windows 11 [Updated 2025 Guide]
- 1.1 What Is the Realtek RPC Audio Error?
- 1.2 Common Causes (2025)
- 1.3 Step 1: Restart Audio Services
- 1.4 Step 2: Clean and Reinstall Realtek Drivers
- 1.5 Step 3: Handle Security Feature Conflicts
- 1.6 Step 4: Run SFC and DISM Repairs
- 1.7 Step 5: Stop Forced Driver Updates
- 1.8 Extra Fixes
- 1.9 Alternative Solution: Use a USB DAC
- 1.10 FAQ
- 1.11 Summary
- 1.12 Related Articles
How to Fix Realtek Audio RPC Error: No Sound on Windows 11 [Updated 2025 Guide]
※ This article contains affiliate links. For details, please see our privacy policy.
What Is the Realtek RPC Audio Error?
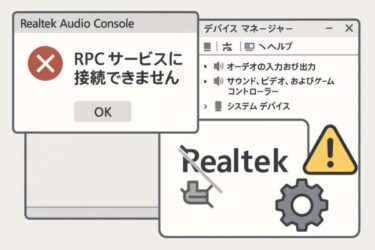
The Realtek Audio RPC (Remote Procedure Call) error usually appears when your PC suddenly loses sound and shows messages like “Audio service is not running”. This means Windows core services (RPC, Windows Audio, Endpoint Builder) failed to communicate with the audio driver.
Since Windows 11 version 24H2, enhanced security features such as Memory Integrity (HVCI), Smart App Control, and the Vulnerable Driver Blocklist sometimes prevent outdated or unsigned Realtek drivers from loading — leading to missing devices or RPC-related errors.
Common Causes (2025)
| Cause | Details |
|---|---|
| Audio services stopped | Windows Audio or RPC services fail to start |
| Driver incompatibility | Unsigned or old Realtek drivers blocked by HVCI/Secure Boot |
| Windows Update override | Generic drivers replace Realtek’s OEM package |
| BIOS settings | Onboard audio disabled in UEFI firmware |
Step 1: Restart Audio Services
- Press Windows + R, type
services.msc, and press Enter. - Restart these services:
- Remote Procedure Call (RPC)
- Windows Audio
- Windows Audio Endpoint Builder
- If they fail, run this in an Administrator PowerShell:
net stop audiosrvnet stop audioendpointbuildernet start audioendpointbuildernet start audiosrv
Step 2: Clean and Reinstall Realtek Drivers
- Open Device Manager → View → Show hidden devices.
- Uninstall old Realtek/Nahimic/A-Volute drivers (right-click → Uninstall device).
- Reboot and install the latest OEM-provided driver package (Dell, ASUS, MSI, Lenovo, etc.). Avoid relying only on Windows Update drivers.
Official page ▶ Realtek High Definition Audio Drivers
Step 3: Handle Security Feature Conflicts
- Memory Integrity (HVCI): Temporarily disable → reboot → install driver → re-enable.
- Smart App Control: Switch off during install if blocked → turn back on afterwards.
- Check driver signatures: In Device Manager → Driver Details → verify a valid digital signature exists.
Note: Only disable Secure Boot temporarily if all else fails. Always re-enable it immediately after driver installation.
Step 4: Run SFC and DISM Repairs
sfc /scannowDISM /Online /Cleanup-Image /RestoreHealthThis restores corrupted system files that may block audio services.
Step 5: Stop Forced Driver Updates
If Windows keeps reinstalling a bad driver, block it:
Extra Fixes
- Disable Sound Enhancements: Playback device → Properties → Enhancements → Disable all effects.
- Enable Onboard Audio in BIOS: Advanced → Integrated Peripherals → set HD Audio = Enabled.
- Offline Install: Disconnect from internet → install driver manually → use wushowhide to block auto-updates.
- New User Profile: If sound works on a new account, your original profile may be corrupted.
Alternative Solution: Use a USB DAC
If problems persist or Realtek Audio Console crashes often, bypass onboard audio entirely. A USB DAC (Digital-to-Analog Converter) or amp connects via USB and avoids driver conflicts, while delivering higher-quality audio.
FAQ
Q1. Realtek doesn’t appear in Device Manager. What now?
Enable onboard audio in BIOS and enable “Show hidden devices” in Device Manager.
Q2. Only HDMI/Bluetooth sound works, but no speakers?
Change the default output in Sound settings → Playback to Speakers (Realtek).
Summary
| Fix | Description |
|---|---|
| Restart Services | RPC and Audio services manually restarted |
| Reinstall Drivers | Use OEM packages, not just Windows Update |
| Handle Security Features | Adjust HVCI, SAC, or Secure Boot temporarily |
| System Repair | Run SFC/DISM to fix corrupted files |
| Block Updates | Prevent unwanted driver overrides |
| USB DAC | Bypass onboard audio for stable, high-quality sound |
By following these updated 2025 steps, most users can restore Realtek audio and avoid repeat RPC errors. If the issue persists, an external USB DAC may provide the most reliable fix.
Related Articles
・Realtek Audio Device Not Showing on Windows 11? Here’s How to Fix It
・Windows 11 Bluetooth Not Working: Causes, Fixes, and Prevention Tips