Introduction
As Windows 11 24H2 rolls out globally, many users are eager to upgrade. But for those with older or custom-built PCs, the excitement often stops with two frustrating error messages:
- “This PC can’t run Windows 11”
- “TPM is not enabled”
- “Secure Boot is not enabled”
If you’re seeing these warnings, you’re not alone. This guide explains what TPM and Secure Boot are, how to enable them, and what to do if your hardware doesn’t officially support the requirements.
What Are TPM and Secure Boot?
Before fixing the problem, it’s important to understand the two technologies at the center of it.
- TPM (Trusted Platform Module): A hardware chip that securely stores encryption keys, certificates, and sensitive data to protect against tampering.
- Secure Boot: A firmware-level feature that ensures only trusted, signed software can run during startup, blocking malware before Windows loads.
Both are required for Windows 11 to meet Microsoft’s security standards.
Step 1 — Check Your Current Settings
Check TPM Status
- Press Windows + R, type
tpm.msc, and hit Enter. - If you see “The TPM is ready for use,” it’s enabled.
- If you see “Compatible TPM cannot be found,” TPM is disabled or missing.
Check Secure Boot Status
- Open the System Information app.
- Find Secure Boot State.
- If it says Enabled, you’re good.
- If it says Disabled or Not Supported, action is required.
Step 2 — Enable TPM and Secure Boot in BIOS (UEFI)
In most cases, these features are simply turned off by default.
How to Enter BIOS (UEFI)
- Restart your PC.
- Immediately press the BIOS key (often F2, DEL, or ESC) repeatedly.
- Once inside, look for TPM and Secure Boot settings.
- TPM may appear as TPM, PTT, or fTPM depending on the manufacturer.
- Secure Boot is usually listed directly under Boot or Security options.
Set both to Enabled, save changes, and restart.
⚠️ Tip: If unsure, check your motherboard or laptop manual before changing BIOS settings.
Step 3 — What If You Can’t Enable Them?
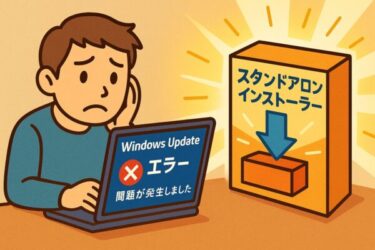
Some older systems lack TPM 2.0 or Secure Boot support. In these cases, you may need a workaround to continue the upgrade.
Common Bypass Methods
- Registry Edit: Modify keys during setup to skip hardware checks.
- Rufus Tool: Create an installation USB that disables TPM and Secure Boot checks.
- Third-Party Tools: Software like Win11Builder can apply bypasses, though caution is required.
⚠️ Important: These bypasses are not officially supported by Microsoft. They may expose you to security risks or future compatibility issues.
Step 4 — Special Considerations for Windows 11 24H2
With version 24H2, Microsoft has tightened hardware checks even further.
- The Media Creation Tool now enforces stricter requirements.
- Some older ISO modification tricks no longer work.
If you plan to use a bypass, verify that your chosen method is still valid for 24H2, and always download tools from trusted sources.
Extra Tip — If You Can’t Enter BIOS
Some users struggle to open BIOS menus due to fast boot or keyboard issues.
Enter BIOS via Windows
- Go to Settings → System → Recovery.
- Under Advanced Startup, click Restart Now.
- On the blue menu, select Troubleshoot → Advanced Options → UEFI Firmware Settings.
If that still doesn’t work, disable Fast Startup in Control Panel → Power Options.
FAQ
Q: Can I add TPM to my PC if it doesn’t have one?
A: Some desktop motherboards support add-on TPM modules, but most laptops cannot be upgraded.
Q: Is it safe to bypass the requirements?
A: Many users do so successfully, but it carries risks — reduced security, driver conflicts, and lack of official support.
Q: What if I don’t want to touch BIOS settings myself?
A: Ask your PC manufacturer’s support or a technician for assistance.
Summary Table
| Situation | Solution |
|---|---|
| TPM/Secure Boot disabled | Enable them in BIOS (UEFI) |
| No TPM chip present | Consider bypass methods (own risk) |
| Secure Boot unsupported | Bypass or alternative install options |
[Affiliate Disclosure] As an Amazon Associate, this site may earn from qualifying purchases.
Recommended Tools Before You Upgrade
💾 External SSD – Always back up your files before BIOS changes or OS upgrades.
👉 Shop external SSDs on Amazon
🔐 TPM 2.0 Module – Essential for Windows 11 if your motherboard supports add-on TPM.
👉 Find TPM 2.0 modules here
📀 USB Stick (Bootable) – Create recovery or installation media easily.
👉 Get USB sticks on Amazon
Final Thoughts
TPM and Secure Boot are the biggest obstacles for many users trying to upgrade to Windows 11 24H2. For most PCs, the solution is as simple as enabling them in BIOS. For others, bypass methods exist — but they come with trade-offs.
Proceed carefully, weigh the risks, and always stay updated on new Microsoft policies. With the right preparation, you can give your PC a safe path forward to Windows 11.
Looking for more troubleshooting tips? Check out these guides:
・ A Complete Beginner’s Guide to Creating and Using It (Windows 10 & 11)
・Gemini Not Starting or Logging In (August 2025): Causes, Fixes, and Alternatives
・How to Show Hidden Files and Folders in Windows 11 (and Windows 10)
・Essential Windows Tips for Working Safely and Comfortably Outside