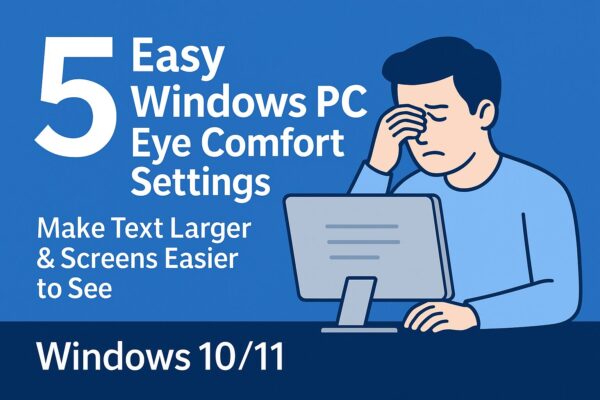
Spending long hours in front of a PC can quickly lead to tired eyes, headaches, blurry vision, and difficulty focusing.
But here’s the good news:
👉 You don’t need new glasses or a new monitor.
👉 You don’t need technical knowledge.
👉 Just a few built-in Windows settings can dramatically reduce eye strain.
This guide walks you through five beginner-friendly adjustments that make text bigger, reduce glare, soften colors, and make everything easier to read—perfect for people who:
- struggle with small text
- find screens too bright
- lose track of the mouse pointer
- feel eye fatigue during work or study
- are not confident with PC settings
You can apply each tip in under a minute.
Let’s make your PC more comfortable—starting now.
- 1 🔵 PR Section: Why Blue-Light-Blocking Glasses Can Help
🌟 Before You Start: A Few Quick Tips
Even before changing Windows settings, two habits help a lot:
- Keep the screen 30–50 cm (12–20 inches) away
- Avoid working in a completely dark room
A dim, softly lit room works best for your eyes.
Now let’s adjust your PC step by step.
1. 🔍 Make Everything Slightly Larger with Display Scaling (Easiest & Biggest Improvement)
If everything on your screen looks tiny—icons, menus, buttons, text—this one change can instantly improve readability.
Windows 11
- Open Start → Settings → System → Display
- Under Scale, choose 125% or 150%
Windows 10
- Open Start → Settings → System → Display
- Under “Change the size of text, apps, and other items” select 125% or 150%
Recommended settings
- Try 125% first
- If it still feels small, increase to 150%
This is the most effective “eye-comfort” setting in Windows.
2. 📝 Enlarge Text Only (Without Enlarging Icons & Windows)
If icons are fine but words look too small, increase only the text size.
Windows 11
- Settings → Accessibility → Text Size
- Move the slider
- Click Apply
Windows 10
- Settings → Ease of Access → Display
- Adjust the “Make text bigger” slider
- Click Apply
Tip
Increase in small steps (5–10%) to avoid layout distortion.
3. 🌙 Reduce Eye Fatigue at Night with “Night Light”
Screens emit blue light, which can cause eye strain—especially at night.
Windows’ Night Light adds a warm tint that feels softer and more natural.
Windows 11
- Settings → System → Display
- Turn Night light ON
- Click Night light settings to adjust:
- Warmth
- Schedule (e.g., Sunset to sunrise)
Windows 10
Same steps: Settings → System → Display → Night light
For best results:
- Use medium strength
- Enable sunset-to-sunrise scheduling
🔵 PR Section: Why Blue-Light-Blocking Glasses Can Help
Even with Night Light enabled, some users still feel tired after long screen sessions.
In those cases, blue-light-blocking glasses can offer additional relief.
Benefits:
- Soften harsh light from screens
- Reduce glare and eye fatigue
- Helpful for night work or long PC sessions
- Easy solution for users not comfortable with Windows settings
- No impact on screen colors (modern lenses are very clear)
These glasses are popular among office workers, students, and remote workers who use PCs for many hours a day.
👉[PR] Blue-Light-Blocking Glasses here
4. 🌓 Use Dark Mode and “Reader Mode” for More Comfortable Reading
White backgrounds are harder on the eyes.
Dark Mode helps reduce glare, especially in Windows settings, apps, and browsers.
Enable Dark Mode (Windows 10/11)
- Settings → Personalization → Colors
- Choose Dark under “Choose your mode”
Microsoft Edge: “Reader Mode”
- Open a webpage
- Click the book icon in the address bar (Reading Mode)
- You can customize:
- Background color (white / cream / dark)
- Text size
- Column style
This mode removes ads and clutter—excellent for reading articles or reports comfortably.
5. 🎯 Make the Mouse Pointer & Text Cursor Easier to See
Many users feel strain simply because they lose sight of the cursor.
Windows 11
- Settings → Accessibility → Mouse pointer and touch
- Choose:
- Pointer color
- Pointer size (increase slightly)
Text Cursor (blinking bar in text fields)
- Settings → Accessibility → Text cursor
- Enable the indicator
- Adjust thickness and color
These adjustments greatly reduce visual stress when typing or editing.
🔍 Bonus: The Built-in Magnifier (and When a Physical Magnifier Is Better)
Windows includes a handy Magnifier tool:
- Windows key + + (plus) → Zoom in
- Windows key + Esc → Close
Perfect for reading tiny buttons or labels.
However, for paper documents, receipts, small print, or switching between screen and physical documents,
a handheld magnifier or digital loupe is often more efficient.
Benefits of a physical magnifier:
- Super clear for printed documents
- Great for bookkeeping, invoices, serial numbers, manuals
- Lightweight and portable
- Helpful for seniors or users with low vision
👉 [PR]The Built-in Magnifier
Final Tips: Don’t Change Everything at Once
To avoid discomfort:
- Change ONE setting at a time
- Use it for the rest of the day
- Adjust only if it still feels small or too bright
- Combine Night Light + Scaling + Dark Mode for best comfort
And remember:
Even with perfect settings, your eyes still need breaks.
Every 20–30 minutes: look away, blink, stretch your neck.
Related Article
・Windows Help Made Easy: A Troubleshooting Guide for Seniors & Beginners
・Master Your Digital Space: Essential File Management for PC Beginners
・Troubleshooting Linux for Beginners — No Command Line Needed!


